Let's Build with PLRelational, Part 2
This article picks up where Part 1 left off, continuing our look at building a real application using PLRelational.
For more background on PLRelational, check out these other articles in the series:
- Reactive Relational Programming with PLRelational
- Introduction to Relational Algebra using PLRelational
- PLRelational: Observing Change
- PLRelational: Storage Formats
In Part 1 of this article, we used PLRelational to build a portion of a to-do application for macOS. In this article, we will follow the same process and focus on building out the right-hand side of the application, specifically the detail view.
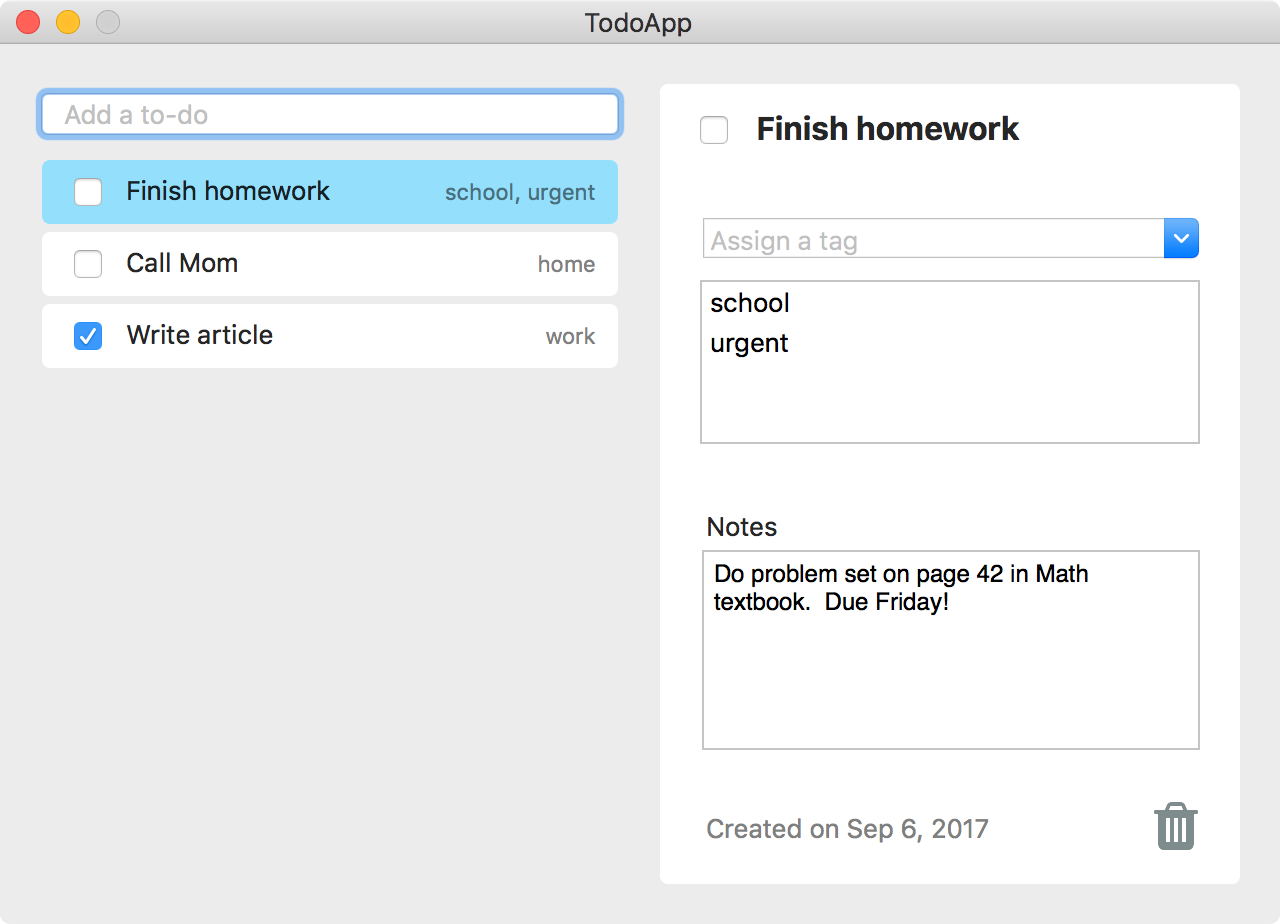
The detail view allows the user to change the status or text of the selected to-do item, apply tags, add notes, or delete the item. Click the "Play" button below to see the detail view in action:
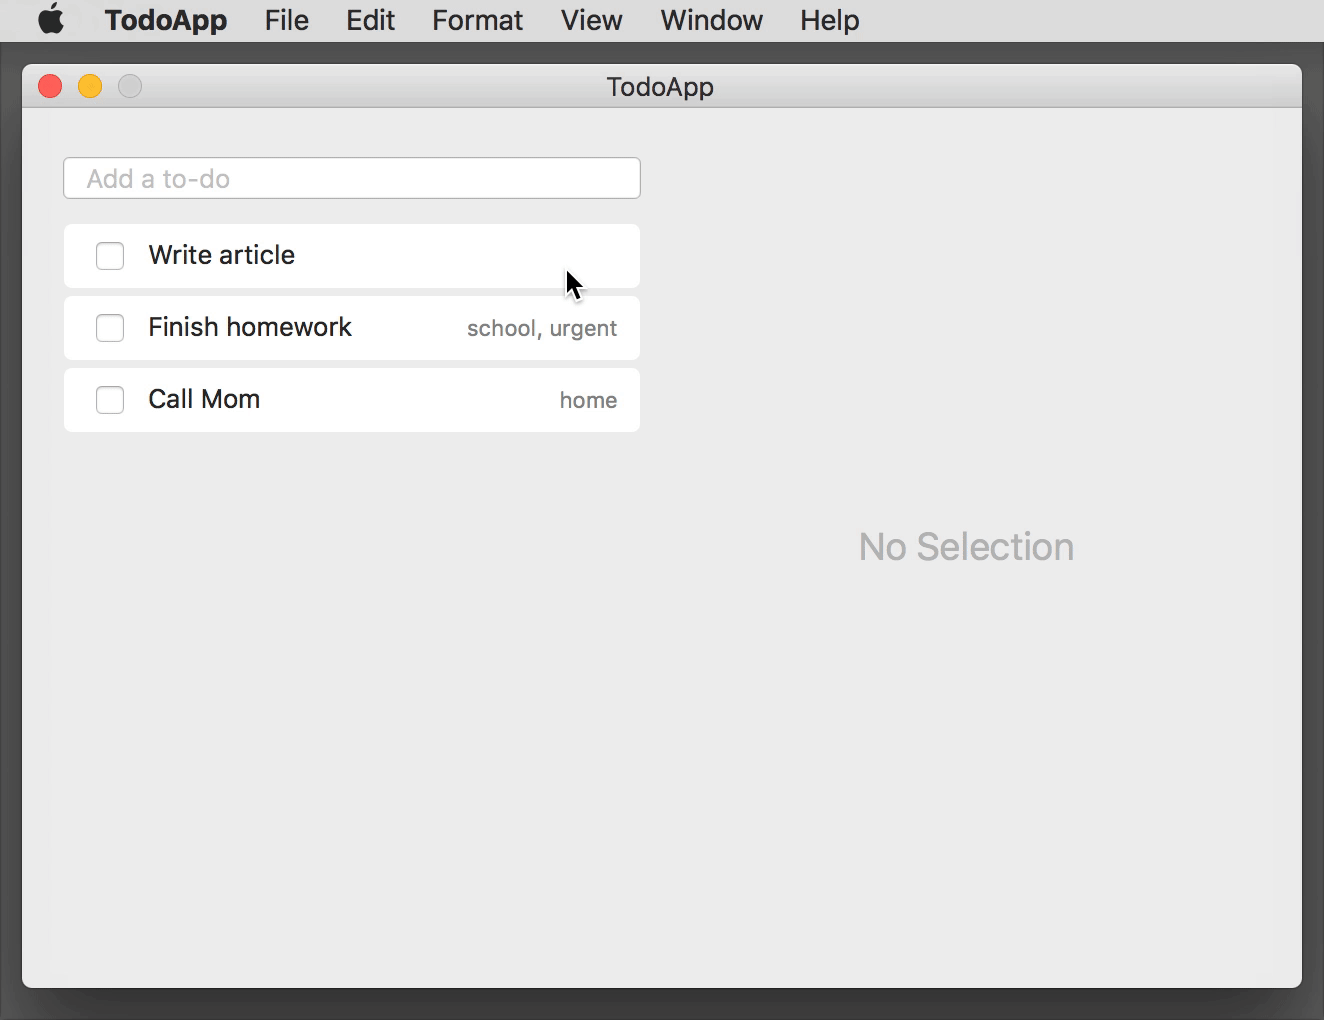
As in Part 1, we've broken the right half of the application down into distinct functional requirements that describe how each piece of the UI should behave.
The following interactive screenshot shows the right half of the app in its completed state. Each red dot corresponds to a single functional requirement. Hover over a dot to read a summary of the requirement, then click to see how we implemented it using PLRelational.
Let's explore how we implemented this half of the application. (To follow along with the complete source code in Xcode, clone the PLRelational repository and open Example Apps > TodoApp in the project.)
REQ-6: Selected Item Detail
A detail view on the right side that allows the user to change information about the to-do item that is currently selected in the list. If there is no selection, the detail view should be hidden and replaced by a gray "No Selection" label.
There are two parts to this requirement.
First we need to bind the selection state of the list view to our selectedItemIDs relation. Every time the user selects an item in the list, the identifier of that item will be poked into the selectedItemIDs relation. In later steps, we will join that relation with others to derive data related to the selected item, such as its title.
Once we have the selection binding in place, we can expose a hasSelection property that resolves to true whenever there is an item selected in the list view. This makes it easy to set up bindings at the view level to toggle between showing the "No Selection" label and the detail view:
class Model { ...
    /// Resolves to the item that is selected in the list of to-do items.
    lazy var selectedItems: Relation = {
        return self.selectedItemIDs.join(self.items)
    }()

    /// Resolves to `true` when an item is selected in the list of to-do items.
    lazy var hasSelection: AsyncReadableProperty<Bool> = {
        return self.selectedItems.nonEmpty.property()
    }()
}

class ChecklistViewModel { ...
    /// Holds the ID of the to-do item that is selected in the list view.  This
    /// is a read/write property that is backed by UndoableDatabase, meaning that
    /// even selection changes can be undone (which admittedly is taking things
    /// to an extreme but we'll keep it like this for demonstration purposes).
    lazy var itemsListSelection: AsyncReadWriteProperty<Set<RelationValue>> = {
        return self.model.selectedItemIDs
            .undoableAllRelationValues(self.model.undoableDB, "Change Selection")
    }()
}

class ChecklistView { ...
    init() { ...
        // Bidirectionally bind list view selection to the view model
        listView.selection <~> model.itemsListSelection
    }
}

class AppDelegate { ...
    func applicationDidFinishLaunching() { ...
        // Toggle the "No Selection" label and detail view depending
        // on the selection state
        detailView.visible <~ model.hasSelection
        noSelectionLabel.visible <~ not(model.hasSelection)
    }
}
Note that we define itemsListSelection as an undoable property, just to show that even things like selection state can be modeled using relations and can participate in the undo system. (Lightroom is an example of an application where selection changes are part of the history stack.)
REQ-7: Selected Item Completed Checkbox
A checkbox at the top-left of the detail view. This should reflect whether the selected to-do item is pending (unchecked) or completed (checked). The behavior of this checkbox is the same as described in REQ-3, except that it controls the selected item's position in the list.
Hooking up the checkbox in the detail view is almost identical to the way we did it for list cells in REQ-3. In fact, we use the same itemCompleted function from Model, except this time we pass it a Relation that focuses on the status value of the selected item:
class DetailViewModel { ...
    /// The completed status of the item.
    lazy var itemCompleted: AsyncReadWriteProperty<CheckState> = {
        let relation = self.model.selectedItems.project(Item.status)
        return self.model.itemCompleted(relation, initialValue: nil)
    }()
}

class DetailView { ...
    init() { ...
        // Bidirectionally bind checkbox state to the view model
        checkbox.checkState <~> model.itemCompleted
    }
}
REQ-8: Selected Item Title Field
A text field to the right of the checkbox in the detail view. This should reflect the title of the selected to-do item. If the user changes the title in the detail view and presses enter, the title should also be updated in the selected list cell.
Just like with the last step, wiring up the text field in the detail view follows the same approach used in REQ-4 (list cell text field):
class DetailViewModel { ...
    /// The item's title.  This is a read/write property that is backed
    /// by UndoableDatabase, so any changes made to it in the text field
    /// can be rolled back by the user.
    lazy var itemTitle: AsyncReadWriteProperty<String> = {
        let titleRelation = self.model.selectedItems.project(Item.title)
        return self.model.itemTitle(titleRelation, initialValue: nil)
    }()
}

class DetailView { ...
    init() { ...
        // Bidirectionally bind title field to the view model
        titleField.string <~> model.itemTitle
    }
}
REQ-9: Assign Tag Combo Box
A combo box with placeholder "Assign a tag". The pull-down menu should include a list of available tags (all tags that haven't yet been applied; if a tag has been applied it should not appear in the menu). The user can also type in an existing tag or new tag. If the user clicks or enters a tag, that tag should be added to the set of applied tags for the selected to-do item.
Combo boxes are complex controls (they are part menu and part text field), so let's break this up into a few parts. First we'll show how we populate the menu of available tags:
class Model { ...
    /// Resolves to the set of tags that are associated with the selected to-do
    /// item (assumes there is either zero or one selected items).
    lazy var tagsForSelectedItem: Relation = {
        return self.selectedItemIDs
            .join(self.itemTags)
            .join(self.tags)
            .project([Tag.id, Tag.name])
    }()

    /// Resolves to the set of tags that are not yet associated with the
    /// selected to-do item, i.e., the available tags.
    lazy var availableTagsForSelectedItem: Relation = {
        // This is simply "all tags" minus "already applied tags", nice!
        return self.tags
            .difference(self.tagsForSelectedItem)
    }()
}

class DetailViewModel { ...
    /// The tags that are available (i.e., not already applied) for the selected
    /// to-do item, sorted by name.  We use `fullArray` so that the entire array
    /// is delivered any time there is a change; this helps to make it
    /// compatible with the `EphemeralComboBox` class.
    lazy var availableTags: AsyncReadableProperty<[RowArrayElement]> = {
        return self.model.availableTagsForSelectedItem
            .arrayProperty(idAttr: Tag.id, orderAttr: Tag.name)
            .fullArray()
    }()
}

class DetailView { ...
    init() { ...
        // Bind combo box menu items to the view model
        tagComboBox.items <~ model.availableTags
    }
}
Next we'll show how to handle when an existing tag is selected in the menu:
class Model { ...
    /// Applies an existing tag to the given to-do item.
    func addExistingTag(_ tagID: TagID, to itemID: ItemID) {
        undoableDB.performUndoableAction("Add Tag", {
            self.itemTags.asyncAdd([
                ItemTag.itemID: itemID,
                ItemTag.tagID: tagID
            ])
        })
    }
}

class DetailViewModel { ...
    /// Adds an existing tag to the selected to-do item.
    lazy var addExistingTagToSelectedItem: ActionProperty<RelationValue> = ActionProperty { tagID in
        self.model.addExistingTag(TagID(tagID), to: self.itemID.value!!)
    }
}

class DetailView { ...
    init() { ...
        // When a tag is selected, add that tag to the selected to-do item
        tagComboBox.selectedItemID ~~> model.addExistingTagToSelectedItem
    }
}
Finally we'll show how to handle when a new tag is entered in the combo field:
class Model { ...
    /// Creates a new tag and applies it to the given to-do item.
    func addNewTag(named name: String, to itemID: ItemID) {
        let tagID = TagID()

        undoableDB.performUndoableAction("Add New Tag", {
            self.tags.asyncAdd([
                Tag.id: tagID,
                Tag.name: name
            ])

            self.itemTags.asyncAdd([
                ItemTag.itemID: itemID,
                ItemTag.tagID: tagID
            ])
        })
    }
}

class DetailViewModel { ...
    /// Creates a new tag of the given name and adds it to the selected to-do item.
    lazy var addNewTagToSelectedItem: ActionProperty<String> = ActionProperty { name in
        // See if a tag already exists with the given name
        let itemID = self.itemID.value!!
        let existingIndex = self.model.allTags.value?.index(where: {
            let rowName: String = $0.data[Tag.name].get()!
            return name == rowName
        })
        if let index = existingIndex {
            // A tag already exists with the given name, so apply that tag
            // rather than creating a new one
            let elem = self.model.allTags.value![index]
            let tagID = TagID(elem.data)
            self.model.addExistingTag(tagID, to: itemID)
        } else {
            // No tag exists with that name, so create a new tag and apply
            // it to this item
            self.model.addNewTag(named: name, to: itemID)
        }
    }
}

class DetailView { ...
    init() { ...
        // Add a new tag each time a string is entered into the combo field
        tagComboBox.committedString ~~> model.addNewTagToSelectedItem
    }
}
Setting up this list view follows roughly the same process that we used for the list of to-do items in REQ-2 through REQ-5:
- Define the
ListViewModel. In this case, the list will contain the array of tags for the selected to-do item, sorted by name. - Define a property to hold the selection state of the list.
- Define properties for each element of the list cell. In this case, there is a single text field for the tag name, and we want to allow the user to edit the name so we set it up as a bidirectional binding.
- Bind the views to those properties we defined in the View Model layer.
Here's what that process looks like in code form:
class Model { ...
    /// Returns a property that reflects the tag name.
    func tagName(for tagID: TagID, initialValue: String?) -> AsyncReadWriteProperty<String> {
        return self.tags
            .select(Tag.id *== tagID)
            .project(Tag.name)
            .undoableOneString(undoableDB, "Change Tag Name", initialValue: initialValue)
    }
}

class DetailViewModel { ...
    /// The tags associated with the selected to-do item, sorted by name.
    private lazy var itemTags: ArrayProperty<RowArrayElement> = {
        return self.model.tagsForSelectedItem
            .arrayProperty(idAttr: Tag.id, orderAttr: Tag.name)
    }()

    /// The model for the tags list, i.e., the tags that have been applied to the
    /// selected to-do item.
    lazy var tagsListViewModel: ListViewModel<RowArrayElement> = {
        return ListViewModel(
            data: self.itemTags,
            cellIdentifier: { _ in "Cell" }
        )
    }()

    /// Returns a read/write property that resolves to the name for the given tag.
    func tagName(for row: Row) -> AsyncReadWriteProperty<String> {
        let tagID = TagID(row)
        let name: String? = row[Tag.name].get()
        return self.model.tagName(for: tagID, initialValue: name)
    }

    /// Holds the ID of the tag that is selected in the tags list view.
    lazy var selectedTagID: ReadWriteProperty<Set<RelationValue>> = {
        return mutableValueProperty(Set())
    }()
}

class DetailView { ...
    init() { ...
        // Bind outline view to the tags list view model
        tagsListView = ListView(model: model.tagsListViewModel,
                                outlineView: tagsOutlineView)

        // Bidirectionally bind list view selection to the view model
        tagsListView.selection <~> model.selectedTagID

        tagsListView.configureCell = { view, row in
            // Bidirectionally bind tag name field to the view model
            let textField = view.textField as! TextField
            textField.string.unbindAll()
            textField.string <~> model.tagName(for: row)
        }
    }
}
REQ-11: Selected Item Notes
A text view that allows the user to type in notes about the selected to-do item.
This step is straightforward. There is a single read/write property that reflects the notes value for the selected to-do item, and we bidirectionally bind it to the TextView:
class Model { ...
    /// Returns a property that reflects the selected item's notes.
    lazy var selectedItemNotes: AsyncReadWriteProperty<String> = {
        return self.selectedItems
            .project(Item.notes)
            .undoableOneString(self.undoableDB, "Change Notes")
    }()
}

class DetailViewModel { ...
    /// The item's notes.
    lazy var itemNotes: AsyncReadWriteProperty<String> = {
        return self.model.selectedItemNotes
    }()
}

class DetailView { ...
    init() { ...
        // Bidirectionally bind content of notes text view to the view model
        notesTextView.text <~> model.itemNotes
    }
}
The TextView class will take care of delivering changes via its text property whenever the user is done editing (as a result of a change in first responder, for example).
REQ-12: Selected Item "Created On" Label
A read-only label that shows when the selected to-do item was created, e.g. "Created on Sep 1, 2017".
This step is also relatively simple. It's a read-only label, so we only have to worry about transforming the raw created timestamp string, as stored in the items relation, to a display-friendly string:
class DetailViewModel { ...
    /// The text that appears in the "Created on <date>" label.  This
    /// demonstrates the use of `map` to convert the raw timestamp string
    /// (as stored in the relation) to a display-friendly string.
    lazy var createdOn: AsyncReadableProperty<String> = {
        return self.model.selectedItems
            .project(Item.created)
            .oneString()
            .map{ "Created on \(displayString(from: $0))" }
            .property()
    }()
}

class DetailView { ...
    init() { ...
        // Bind "Created on <date>" label to the view model
        createdOnLabel.string <~ model.createdOn
    }
}
Let's dissect that createdOn declaration:
// Start with the `selectedItems` relation
self.model.selectedItems

// Take (`project`) the `created` attribute of the `selectedItems` relation
.project(Item.created)

// Derive a `Signal` that carries the raw timestamp string when there is a
// selected to-do item (or an empty string when there is no selection)
.oneString()

// Convert the raw timestamp string into a display-friendly one
.map{ "Created on \(displayString(from: $0))" }

// Lift the `Signal` into an `AsyncReadableProperty` that offers the latest value
.property()
This is another example of the Relation -> Signal -> Property pattern that we discussed earlier in REQ-5. You will encounter this pattern frequently when working with PLRelationalBinding, so it's a good idea to familiarize yourself with it.
REQ-13: Delete Selected Item Button
A delete button. If the user clicks this button, the selected item should be deleted (removed from the list entirely) and the list selection should be cleared (no item selected).
We're almost done! Deletion is an interesting case because we need to be able to delete not just the row in the items relation but also the associated rows in itemTags and selectedItemIDs. If we had the ID of the selected item handy we could simply issue three asyncDelete calls and be done with it, but where's the fun in that? Nowhere, that's where. So instead, let's demonstrate the fancy cascadingDelete function:
class Model { ...
    /// Deletes the row associated with the selected item and
    /// clears the selection.  This demonstrates the use of
    /// `cascadingDelete`, which is kind of overkill for this
    /// particular case but does show how easy it can be to
    /// clean up related data with a single call.
    func deleteSelectedItem() {
        undoableDB.performUndoableAction("Delete Item", {
            // We initiate the cascading delete by first removing
            // all rows from `selectedItemIDs`
            self.selectedItemIDs.cascadingDelete(
                true, // `true` here means "all rows"
                affectedRelations: [
                    self.items, self.selectedItemIDs, self.itemTags
                ],
                cascade: { (relation, row) in
                    if relation === self.selectedItemIDs {
                        // This row was deleted from `selectedItemIDs`;
                        // delete corresponding rows from `items`
                        // and `itemTags`
                        let itemID = ItemID(row)
                        return [
                            (self.items, Item.id *== itemID),
                            (self.itemTags, ItemTag.itemID *== itemID)
                        ]
                    } else {
                        // Nothing else to clean up
                        return []
                    }
                }
            )
        })
    }
}

class DetailViewModel { ...
    /// Deletes the selected item.  This demonstrates the use of
    /// `ActionProperty` to expose an imperative (side effect producing)
    /// action as a property that can easily be bound to a `Button`.
    lazy var deleteItem: ActionProperty<()> = ActionProperty { _ in
        self.model.deleteSelectedItem()
    }
}

class DetailView { ...
    init() { ...
        // When the button is clicked, delete the selected item
        deleteButton.clicks ~~> model.deleteItem
    }
}
This was a pretty straightforward use of cascadingDelete, but it offers other features (not used in this particular example) that really come in handy when deleting lots of interconnected data and repairing connections affected by the deletion. Additionally, there is a companion to cascadingDelete called treeDelete that simplifies deletion of hierarchical data. For more on these, check out MutableRelationCascadingDelete.swift in the repository along with some example uses in RelationTests.swift.
Quiet Victories
While most of this article was focused on showing how succinctly and easily we can build a user interface using PLRelational, it's worth noting the things you didn't see. These are just a few of the things you no longer have to worry about, because PLRelational does the hard work for you:
Objects, object graphs, observers: In a traditional application, we would have defined classes or structs for things like
ItemandTag, and we would have had to maintain some sort of manager/controller to handle loading them from disk (and saving them back again), maintaining the relationships in a complex graph, updating those objects and sending out notifications to observers when something has changed, and so forth. With PLRelational, all of this gets handled throughRelations and their reactive extensions; in our to-do application, we never explicitly loaded data into objects, and data flows from disk up to the user interface and back again through thoseRelations.Undo/Redo: In a traditional application, we would have had to register with the
UndoManagerseparate imperative methods for each undoable action: one to apply the change, and one to roll it back (along with the required support in the user interface layer to correctly react to those changes). With PLRelational, deltas can be automatically computed with each change, so implementing undo/redo support in your application is as easy as providing a "forward" transaction. When the user performs an undo or redo operation, the framework simply reverts the relations to a particular snapshot, and the user interface layer automatically updates by virtue of the reactive bindings.Table updates: In a traditional Cocoa application, we would have had to implement the
NSTableViewDataSourceandNSTableViewDelegateprotocols, writing fragile logic to coordinate updates to the table view in response to some changes in the object graph. With PLRelational, theArrayPropertyandListViewclasses work in concert, tracking changes made in the relations and delivering them in a nice bundle to the underlyingNSTableViewwith almost no custom logic needed on your part.
Wrapping Up
Over the course of this two-part article, we demonstrated how to use PLRelational to model source relations and then use a reactive-relational style of programming to build a working macOS application.
The vocabulary offered by PLRelational makes it easy to declare — and reason about — the relationships between data in your application and how it is presented in the user interface. Although we focused on building a macOS application in this article, the same techniques can be used to simplify development of iOS applications as well. (And perhaps we will demonstrate just that in a future article!)
The complete source code for this application is available in the PLRelational repository under the Examples/TodoApp directory and can be run directly from the Xcode project.
Finally, if you've been experimenting with PLRelational and have thoughts to share, or have a topic related to these frameworks that you'd like us to cover, please tweet at us or mail it in!
The Plausible Blog
Latest news and musings from the co-op.
Follow us: @plausiblelabs
Recent Articles
- PLCrashReporter Stewardship Moving to Microsoft September 12, 2019
- A New Home for VoodooPad December 14, 2017
- PLRelational: Query Optimization and Execution October 3, 2017
- Let's Build with PLRelational, Part 2 September 28, 2017
- Let's Build with PLRelational, Part 1 September 18, 2017