Plausible Lab: Part #2 – Shelving
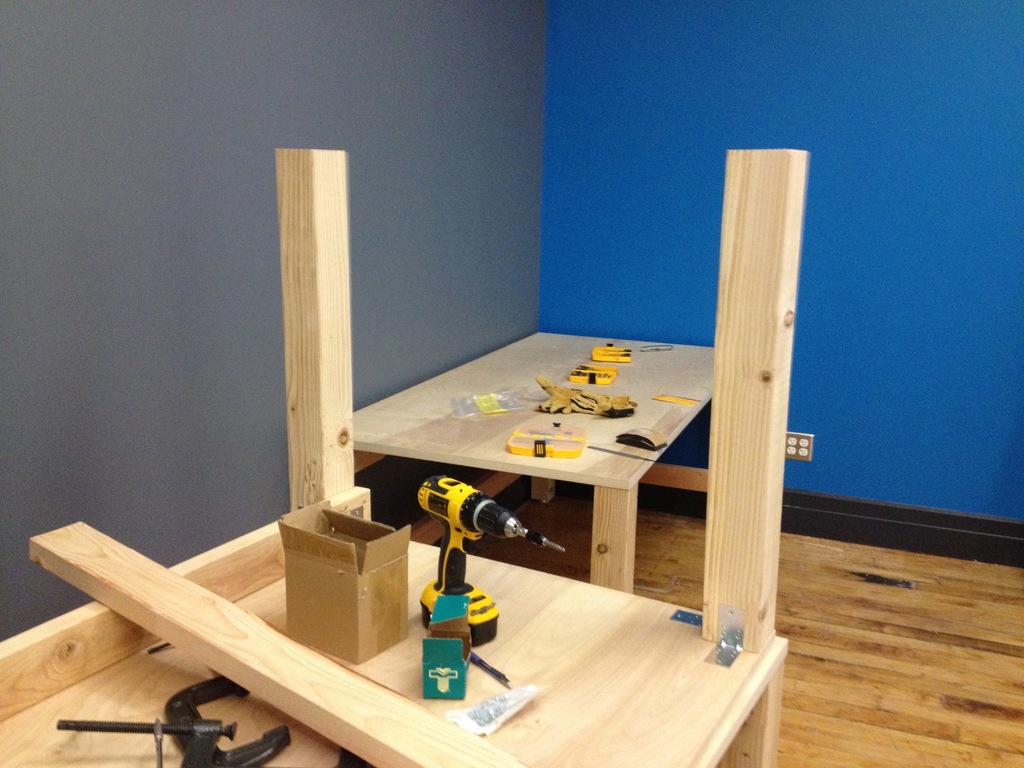
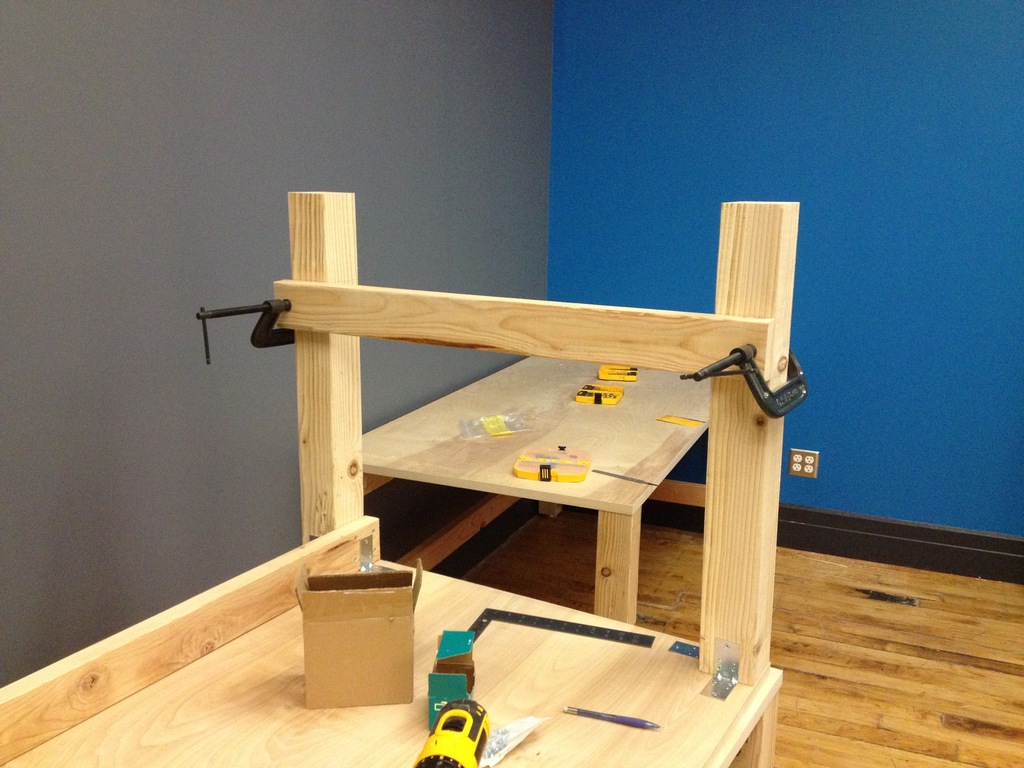
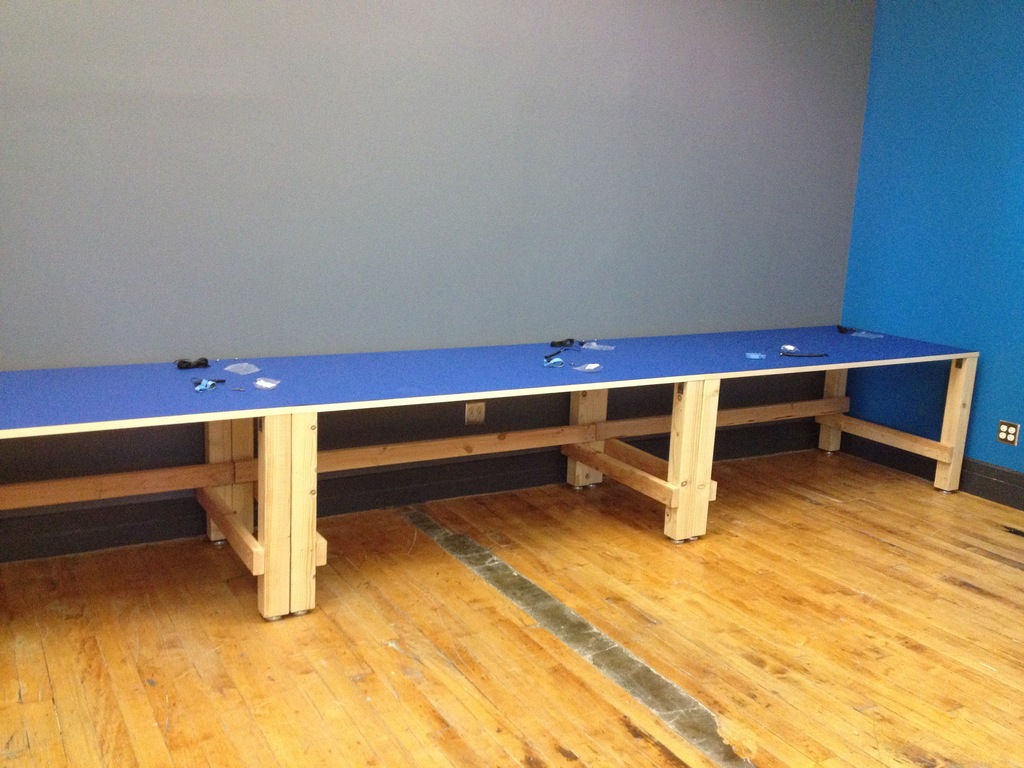
In my previous post, I described the work benches I built for our new electronics lab at Plausible Labs. With the benches in place, the final missing piece was shelving, and after I spent a long weekend and a few weeknights hanging the shelving, I’m pretty happy with the result:
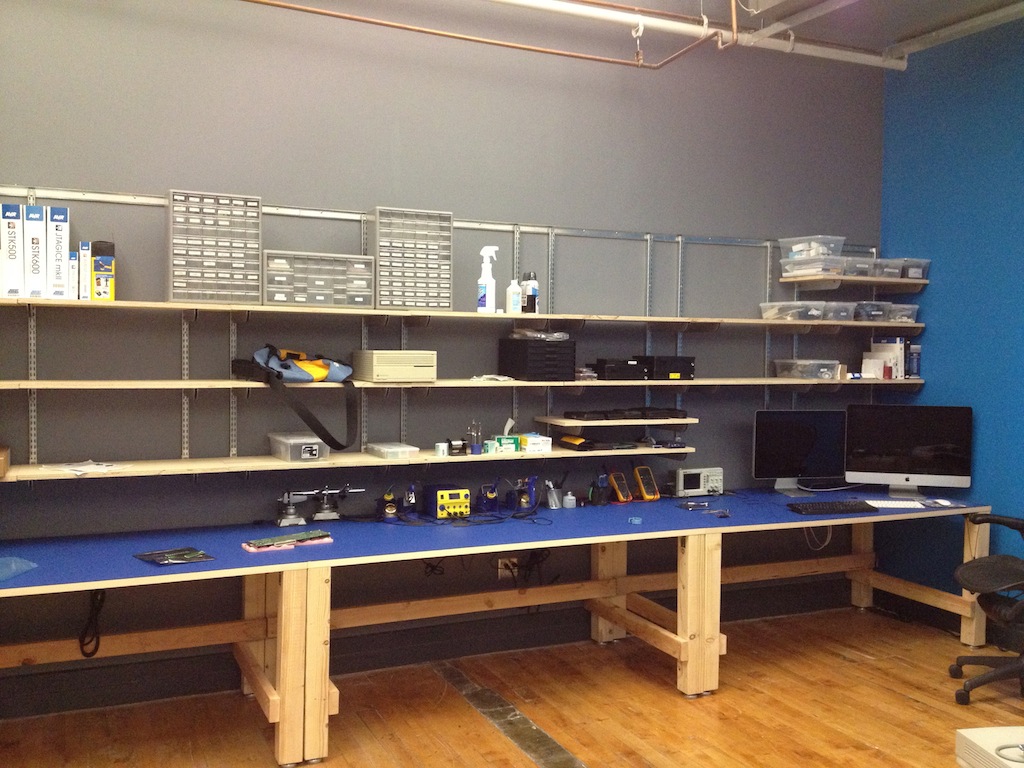
It’s surprisingly easy to fill a set of shelves, so I wanted to make sure we had a ton of capacity, and that we could easily adjust the shelving positions to fit our needs. I decided to use standard “double slot” shelving tracks, with 31″ x 14″ individual shelves, spanning the full 18′ of the desk surface area.
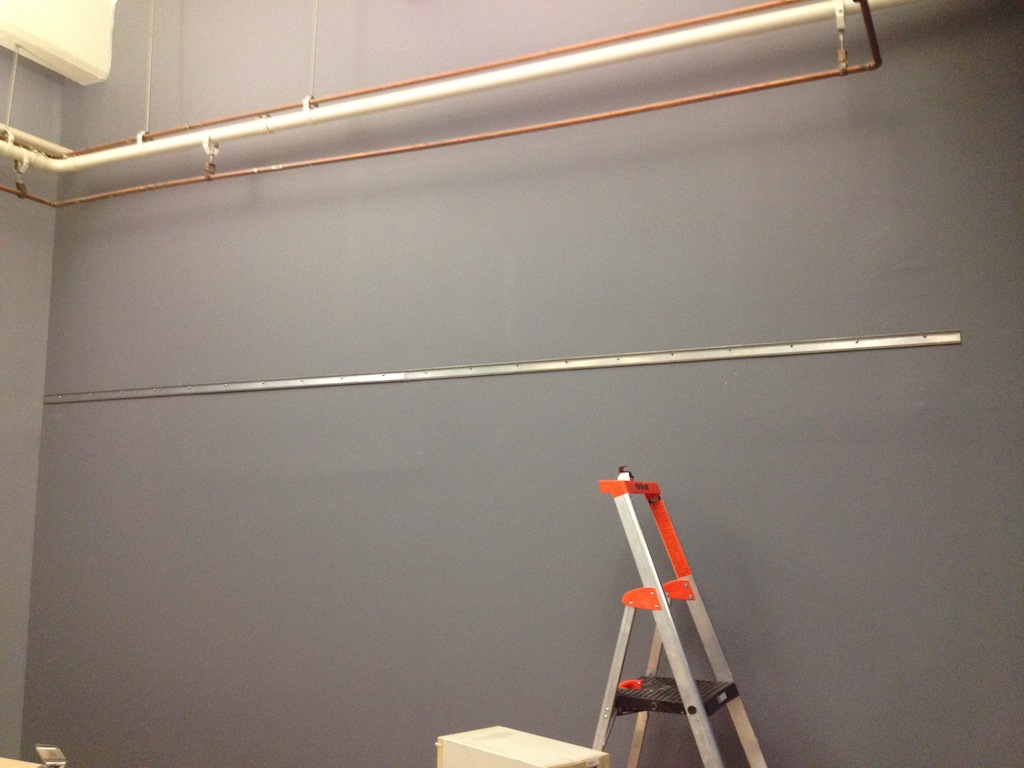
To ensure sturdy mounting — and simplify leveling of the shelves — I decided to mount a single hanging track from which the shelving standards are hung. To level the track I used a combination of a 4′ level and a standard chalk line reel. There are fancier laser levels available, but I was pretty happy with the results with a simple chalk line. Once the line was in place and level, I marked out the studs using a standard stud finder, to be used when lining up the track for mounting.
The walls were built with metal studs positioned at standard 16″ intervals, so I used sheet metal screws to actually mount the hanging track to the wall studs. This required drilling pilot holes in the studs, but was far less damaging to the drywall than using toggle bolts or similar. The track itself did not perfectly fit the required 18′ of space and needed to be shortened; a standard hacksaw made quick work of it.
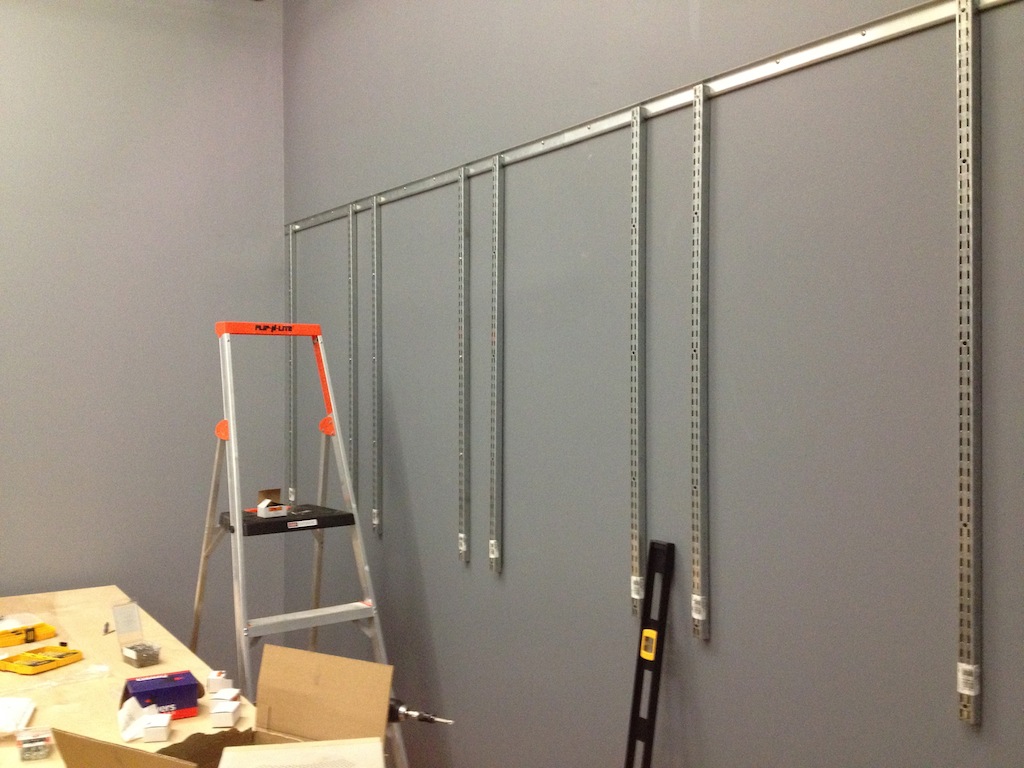
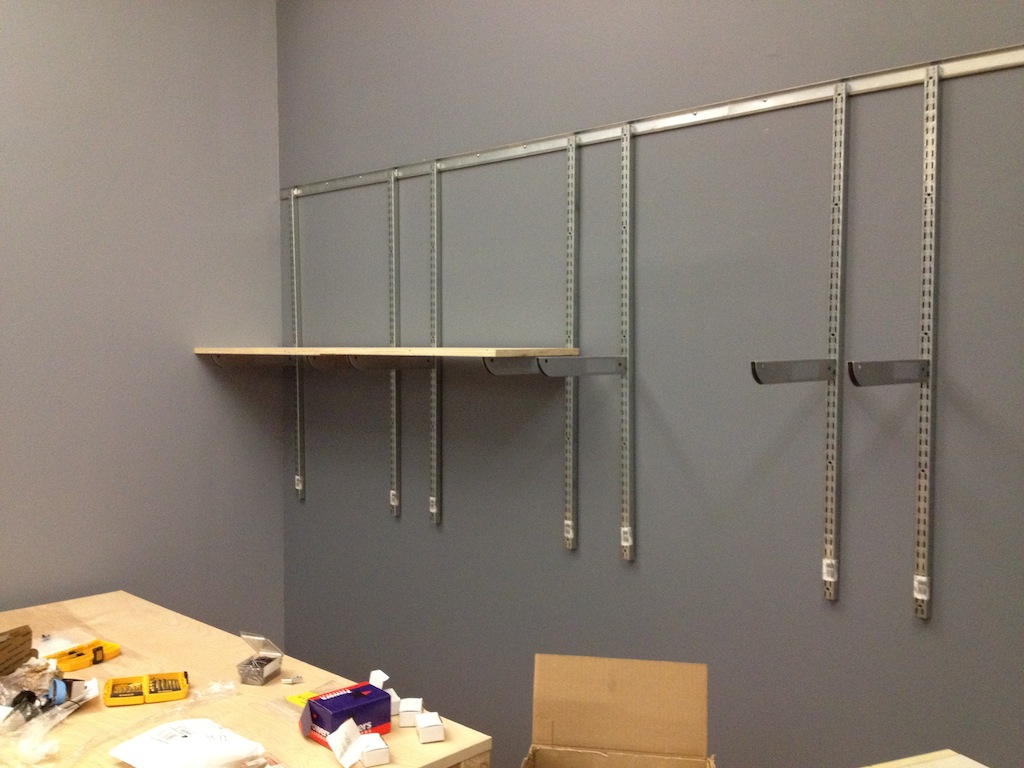
Once the track was mounted, I was able to mount the actual shelving standards. I decided to space them out such that every other track is mounted directly into a wall stud, hopefully providing additional support than just the hanging track alone.
Parts List
Plywood & Hardwood
The shelves themselves are simple plywood. For increased strength (and improved aesthetics), you can glue or nail a hardwood strip to the front of the shelves — I haven’t done this yet, but it’s on my TODO list. Really.
I once again hit up our local Lumber City & Building Supply, based in my neighborhood in Williamsburg. These guys are fantastic.
Plywood is generally available in 8′ x 4′ sheets, and with my 31″ x 14″ shelving, I was able to get 9 shelves per sheet. With 18′ to span and 3 levels of shelving, this came to a total of 21 shelves.
Hardware
I purchased all my hardware from McMaster-Carr, including the shelving hardware itself. Although they don’t list a manufacturer in the McMaster-Carr catalog, the shelving hardware I purchased was manufactured by the John Sterling Corporation.
The full parts list follows, with links to McMaster-Carr. The parts list is for a full 18′ x 4′ of shelving, so you’ll need to adapt it for your own needs.
- 80″ hanging track – 3 total
- Shelving Standards, 48″ long – 15 total
- Shelf Brackets, 13 7/8″ Depth – 42 total
- Sheet Metal Screw, No 10 Size, 1-1/4″ Length – 2 boxes. Used to mount hanging track into metal studs and drywall.
- Sheet Metal Screw, No 10 Size, 2″ Length – 2 boxes. Used to mount standards into metal studs and drywall.
If you’re mounting into wood studs, you’ll need to swap the sheet metal screws for standard wood screws. While I re-used the sheet metal screws for mounting into drywall, it should be noted that these aren’t load-bearing, and aren’t a substitute for real anchoring. I’m relying on the hanging track and stud-mounted standards to bear the load, and merely using the sheet metal screws to loosely fasten the remaining standards in place.
Tools
- Power Drill & Bits: The bits depend on the studs you’re mounting the shelving to. I used #10 sheet metal screws, but you’ll want different hardware for wood studs. If you’re planning on using finishing nails to mount hardwood strips to the edge of your shelves, you’ll also need a bit to drill pilot holes.
- Chalk line reel: You’ll need a chalk reel to mark a straight edge for the hanging shelving track.
- 4′ Level: Comes in particularly handy when leveling the hanging track.
- Hacksaw: If you need to cut the hanging track to fit, you’ll find that a hacksaw can make short work of it.
- Quick-grip Bar Clamps: If you’re planning on using a hardwood strip to strengthen the shelves, you’ll need at least two of these to hold the shelves together while you glue and/or use finishing nails to permanently affix the hardwood to your shelves.
- Nail Punch: This is required to drive finishing nails flush or below the surface of the wood, if you plan to affix hardwood to your shelves using finishing nails.


Plausible Lab: Part #1 – Workbenches
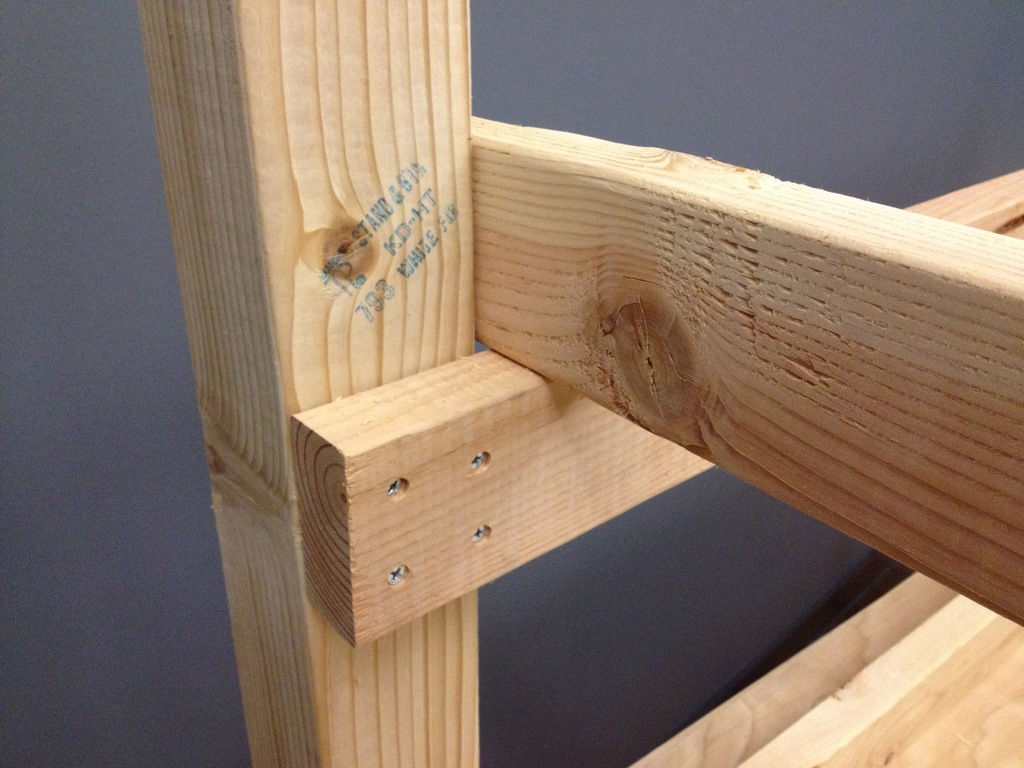
Given my lack of woodworking experience, I wanted a simple, sturdy design that could be built with only a drill and some simple tools. Thus, the design I used can be built with only screws, metal brackets, and pre-cut lumber, and it’s based entirely on eyeballing David L. Jones’ work benches in his awesome new lab. Any stupid design decisions are, of course, my own. If you haven’t yet discovered David’s EEVBlog, check it out! It’s worth watching!
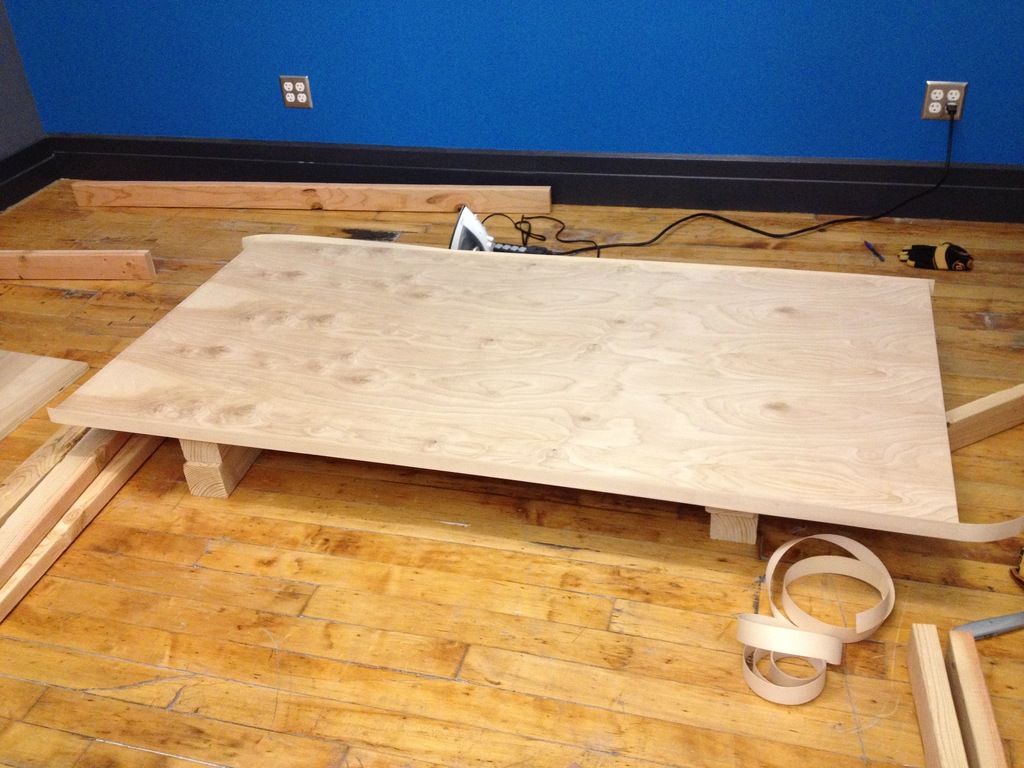
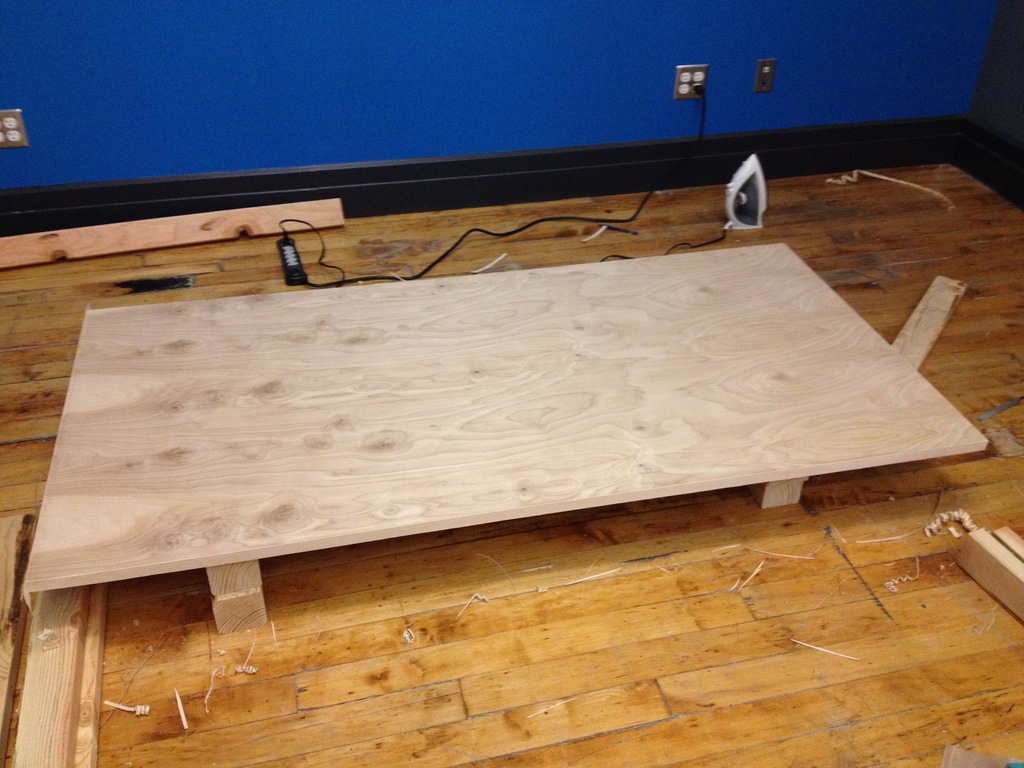
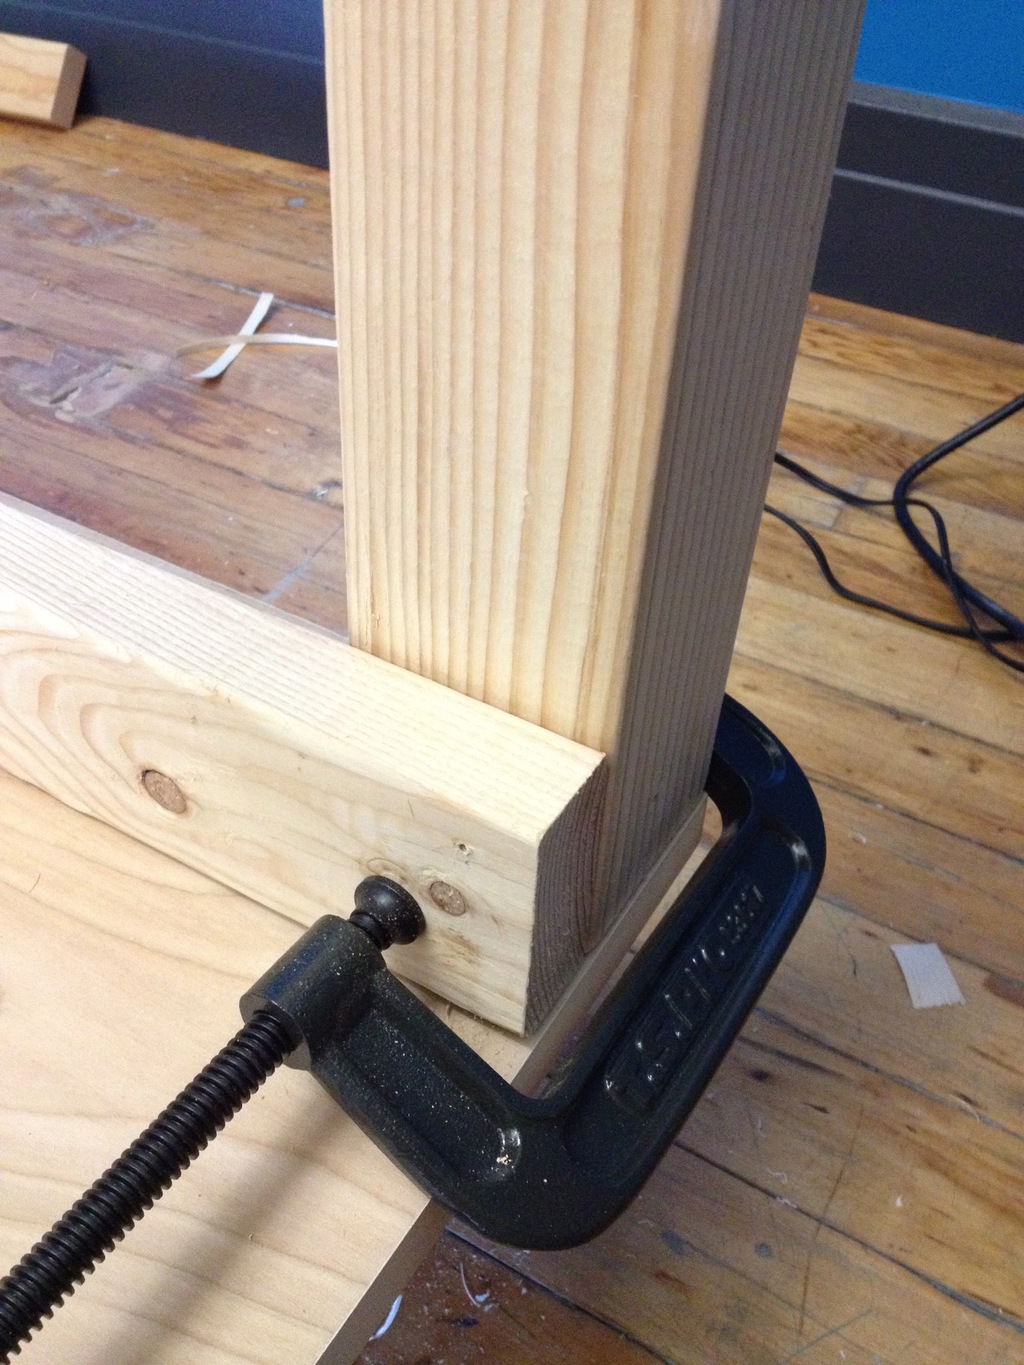
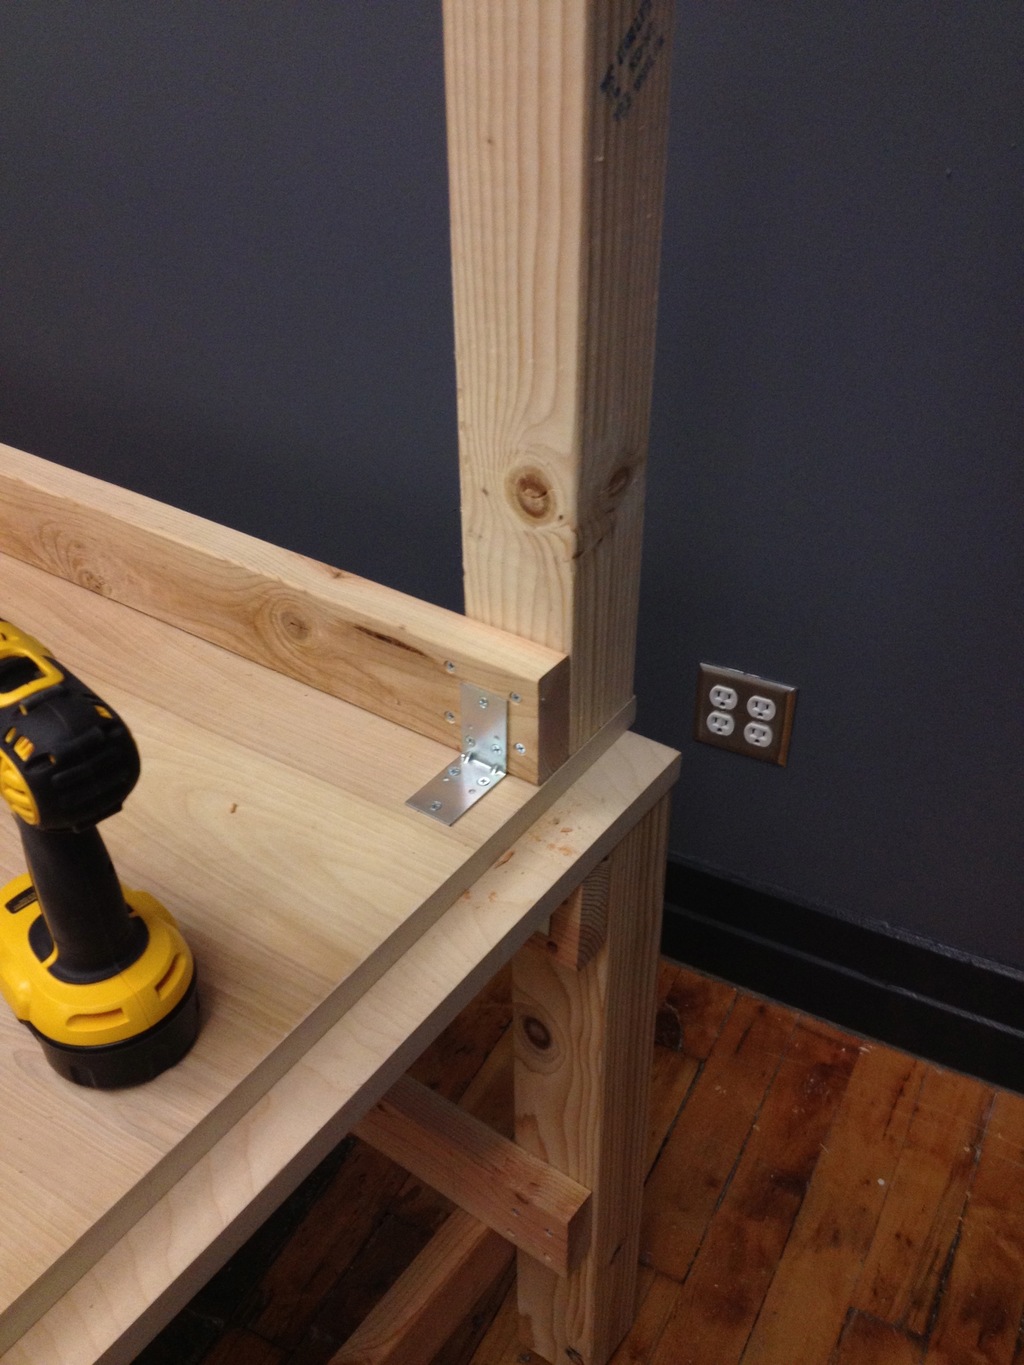
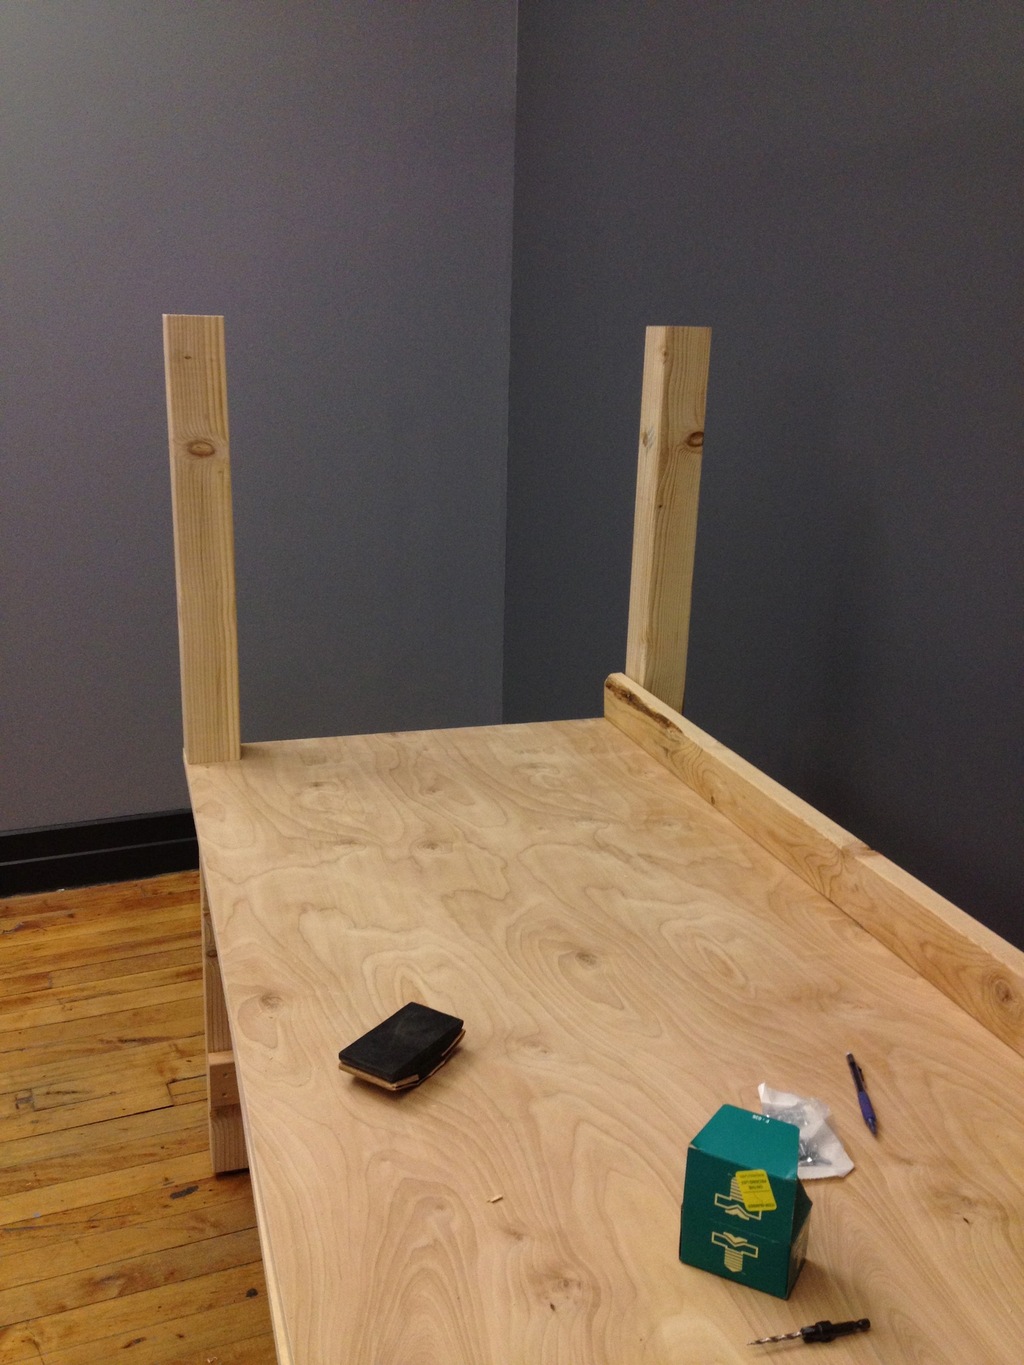
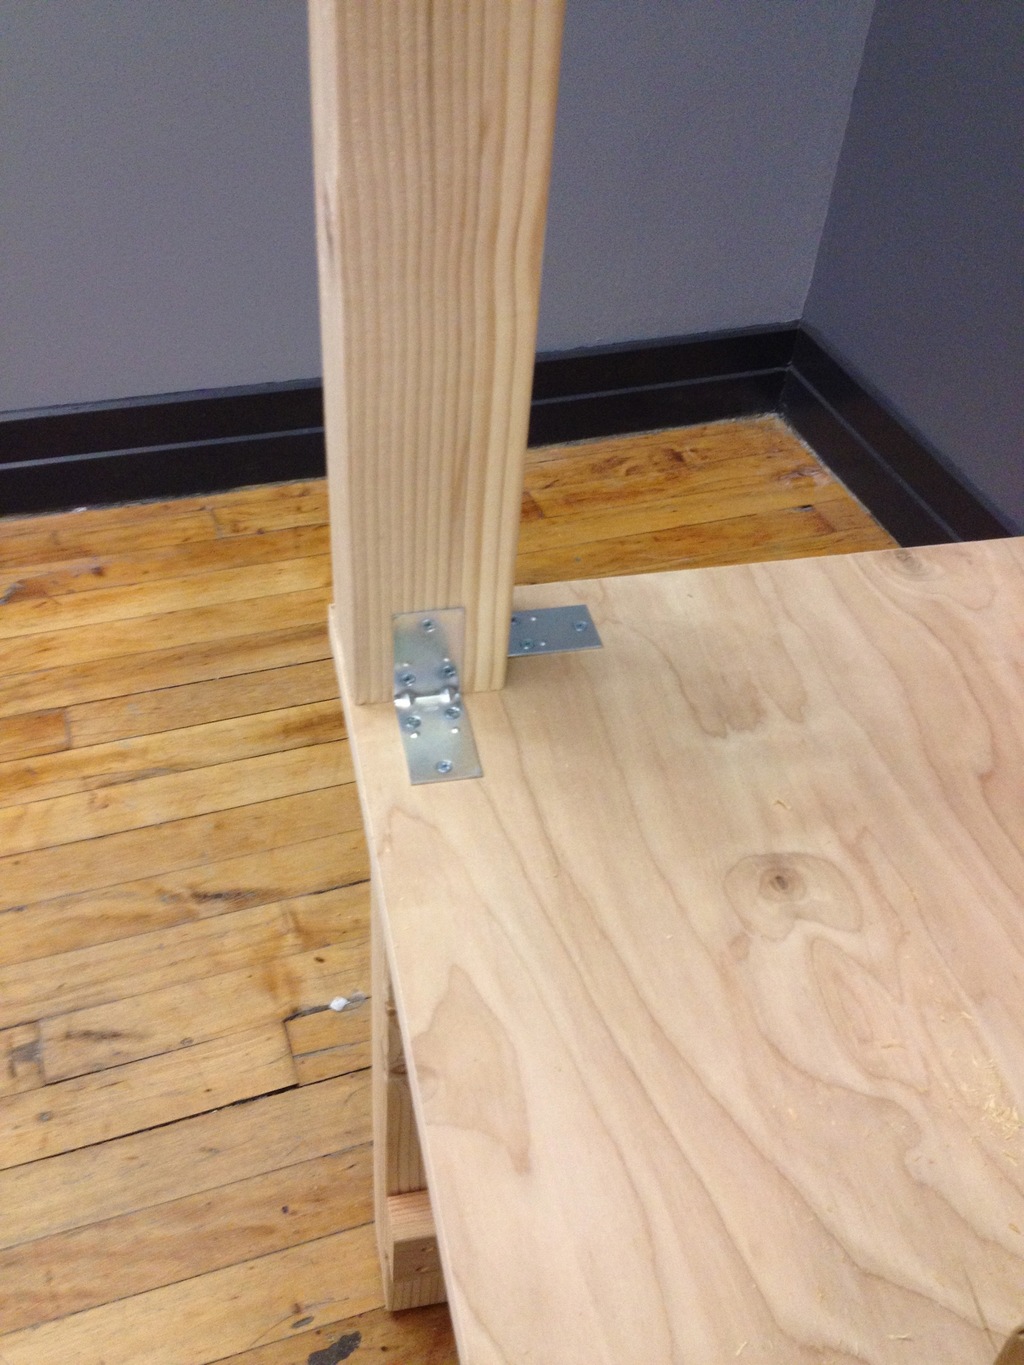
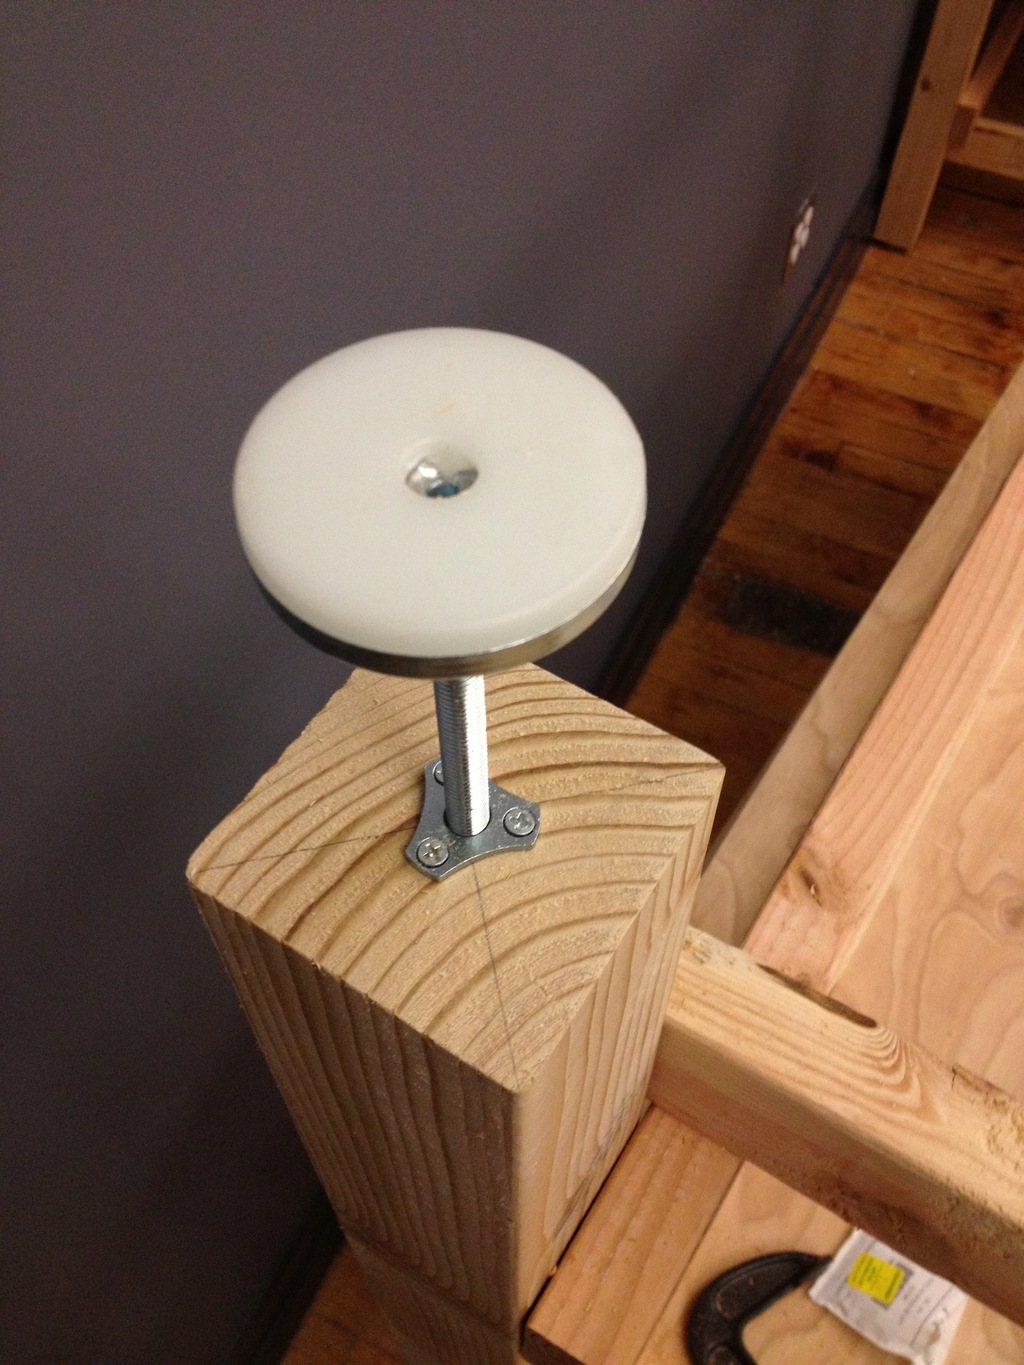
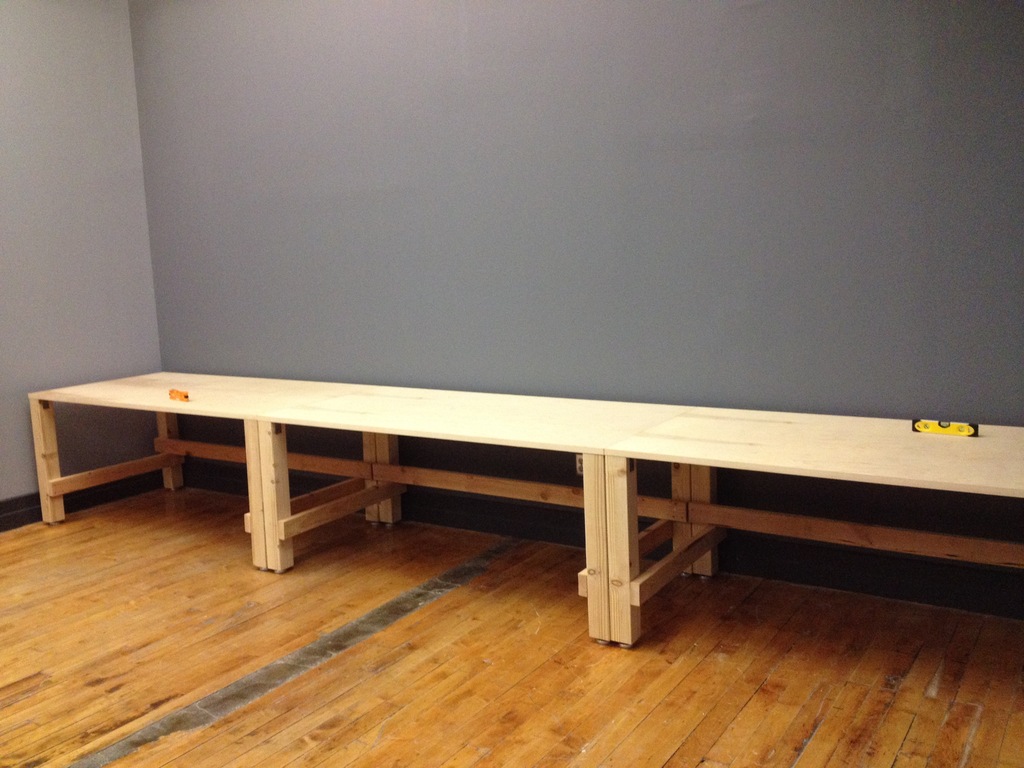
In terms of design, the 18′ work surface is composed of three individual benches, each topped by 6′ by 3′ of Canadian Birch plywood. I kept the tables separate just in case we ever want to re-organize the room by breaking up the large bench. I also decided to use 30″ high surface, rather than a higher standing/stool height, but I did include adjustable feet that can raise the surface a bit. If we find ourselves really wanting a higher bench, I might have to get a bit clever to modify these.
Each bench is covered with rubber ESD mats, conveniently sold by All-Spec in matching 6′ x 3′ sizes. If you’re not familiar with ESD mats, they’re used to help prevent ESD damage to components by bleeding off any electrostatic charge through their dissipative top layer, via their conductive bottom layer. The rubber surface itself is a tough, heat-resistent material, which is perfect for a work bench on which you’ll be dealing with hot soldering irons, sharp objects, and occasional chemicals. You can see the blue mats on the benches in the photo above, although I’ve yet to attach them to ground.
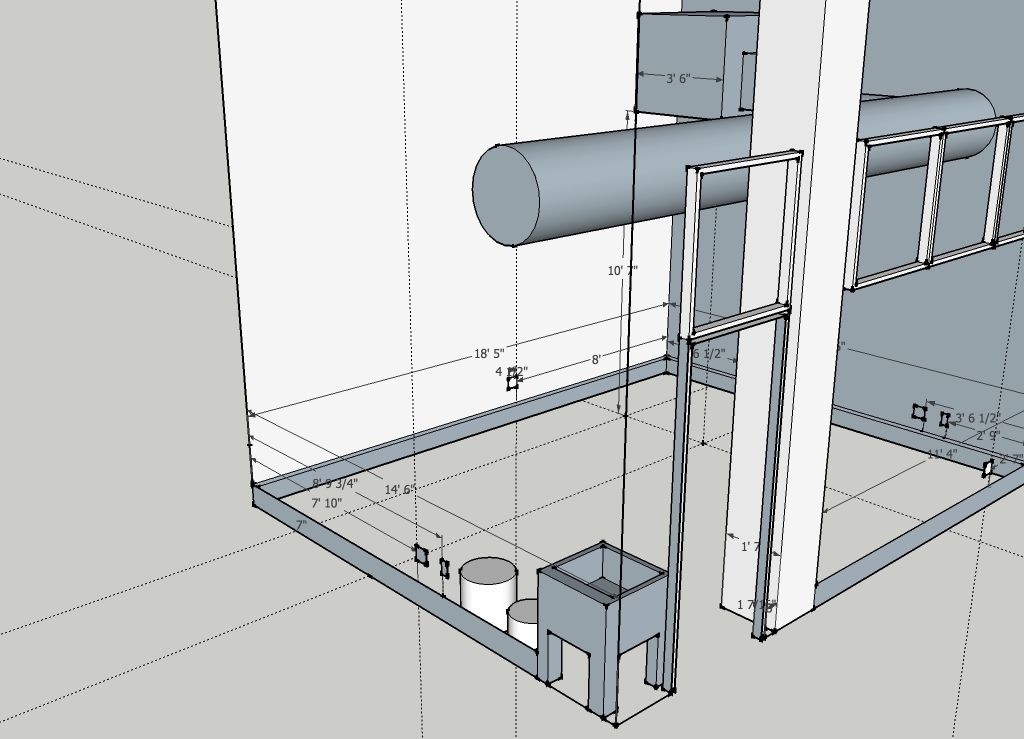
Here’s the design I sketched out for the benches:

In the final build, I moved the top support beam up to sit flush with the desk surface, to help prevent the plywood from bowing across the rather long 6′ span. Given the number of supports and the size of the lumber, the benches are ridiculously sturdy — possibly more so than they have to be.
If you’d like to replicate these benches (or some variation), I’ve included my parts list below. Additionally, you can browse the gallery of photos I took while building the benches.
Parts List
Lumber & Plywood
You can pick up the lumber and plywood for these benches at your local lumber yard. Here in Brooklyn, I went to Lumber City & Building Supply, based in my neighborhood in Williamsburg. They cut all the wood to size and delivered to our loading dock the next business day, which saved me a ton of work, and meant I didn’t need any power tools besides my drill.
Be aware that lumber uses nominal sizes, which you need to take into account when sketching out your own designs. A 2″ by 4″, for instance, is usually more like 1.5″ x 3.5″.
For each bench as described above, you’ll need the following lumber:
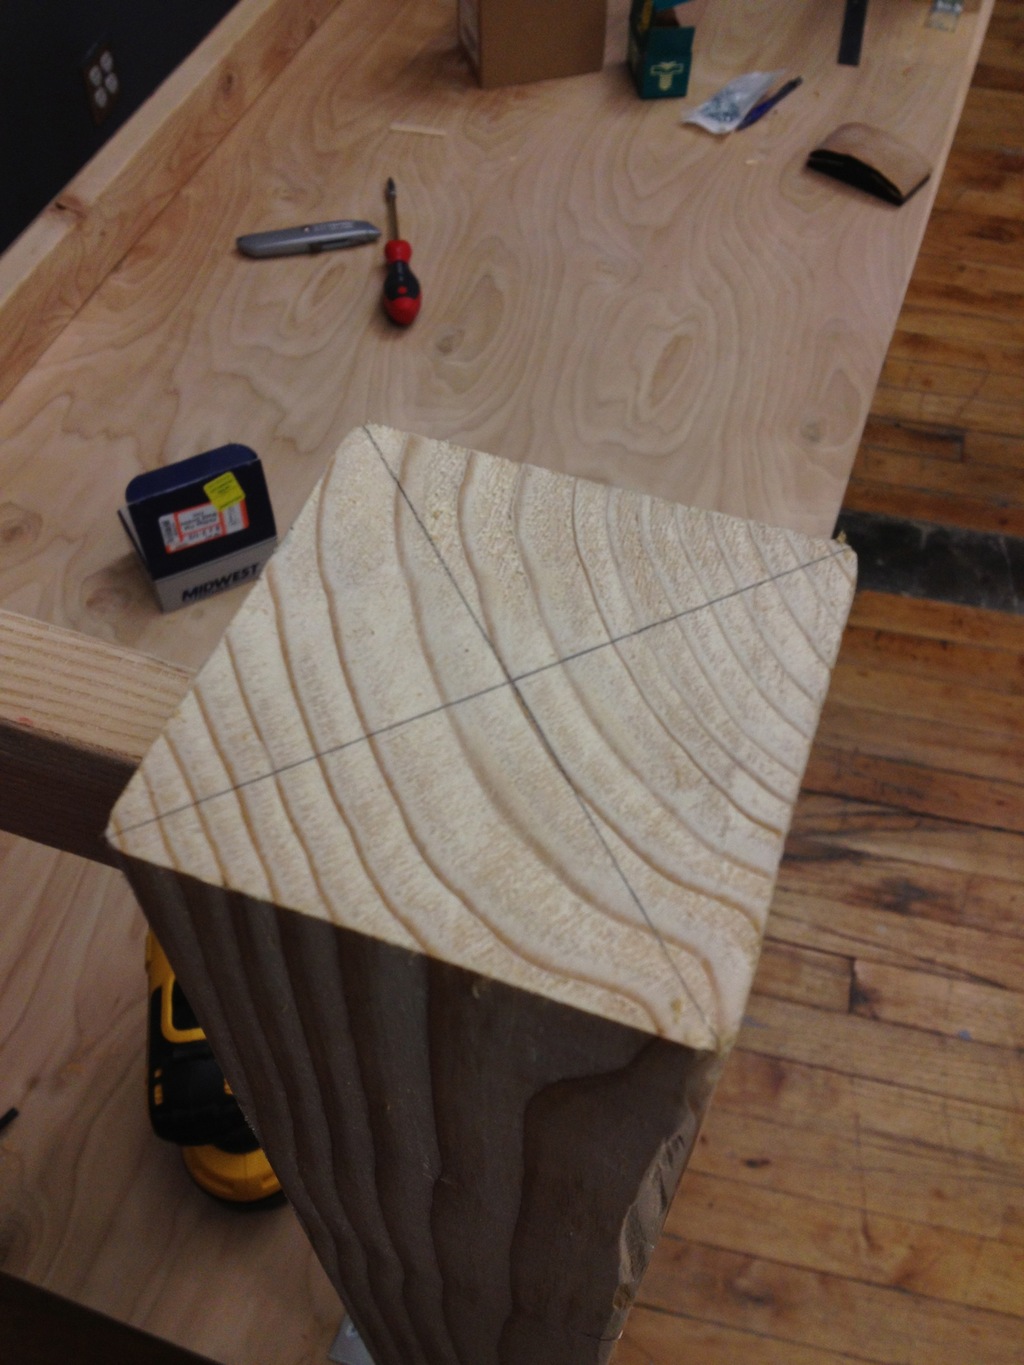
- Legs: 28.5″ x 4″ x 4″ – 4 total
- Side frame: 36″ x 2″ x 4″ – 2 total
- Rear frame: 6′ x 2 ” x 4″ – 2 total
- Top (plywood) surface: 6′ x 36″ x 1.5″ – 1 total
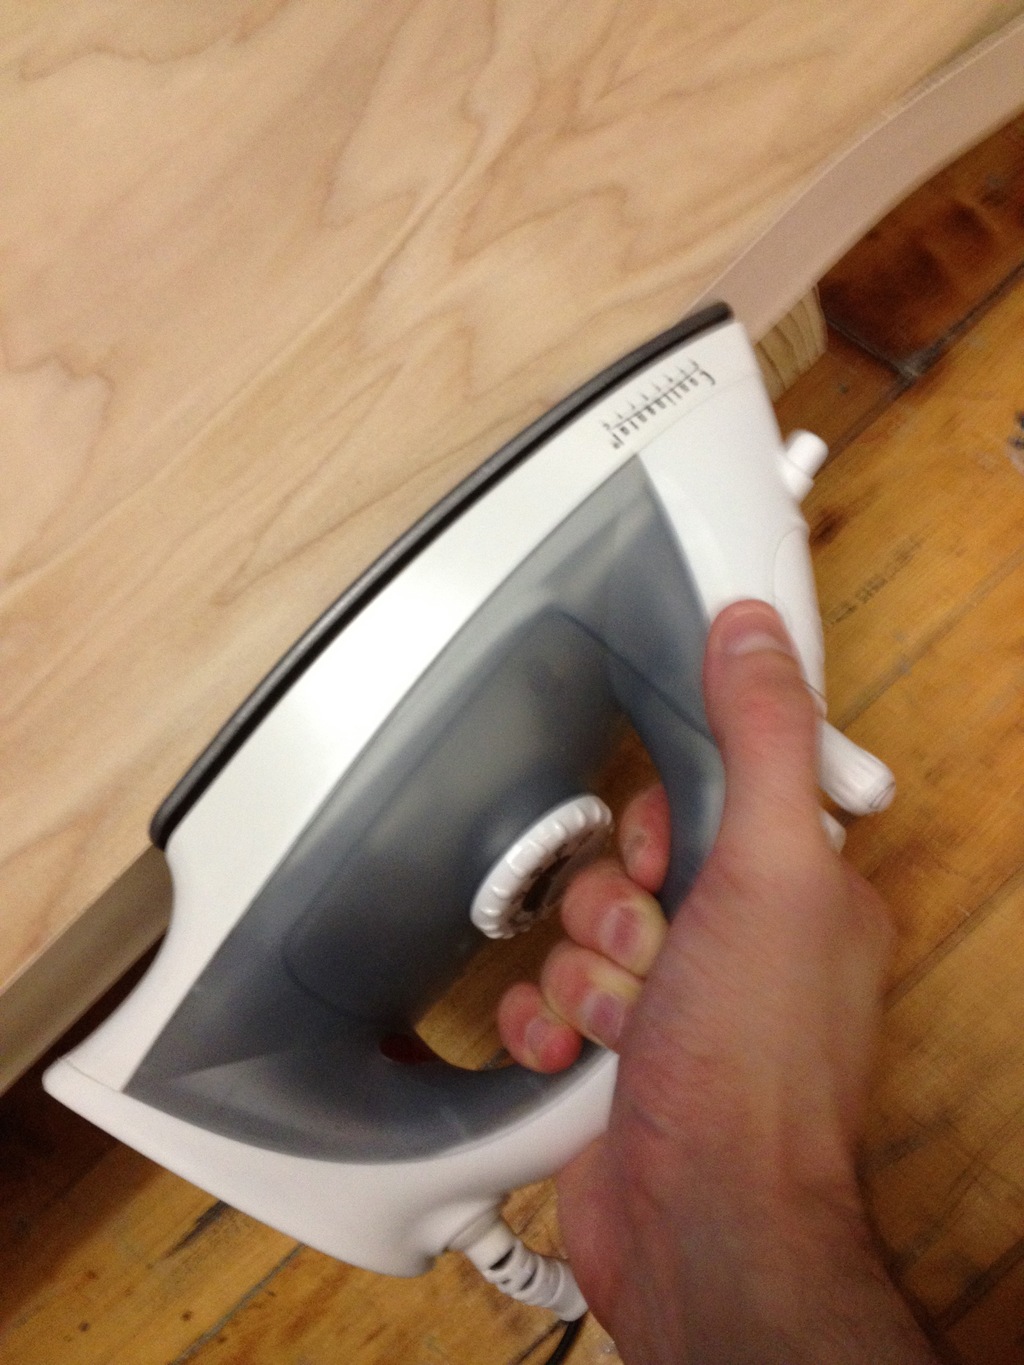
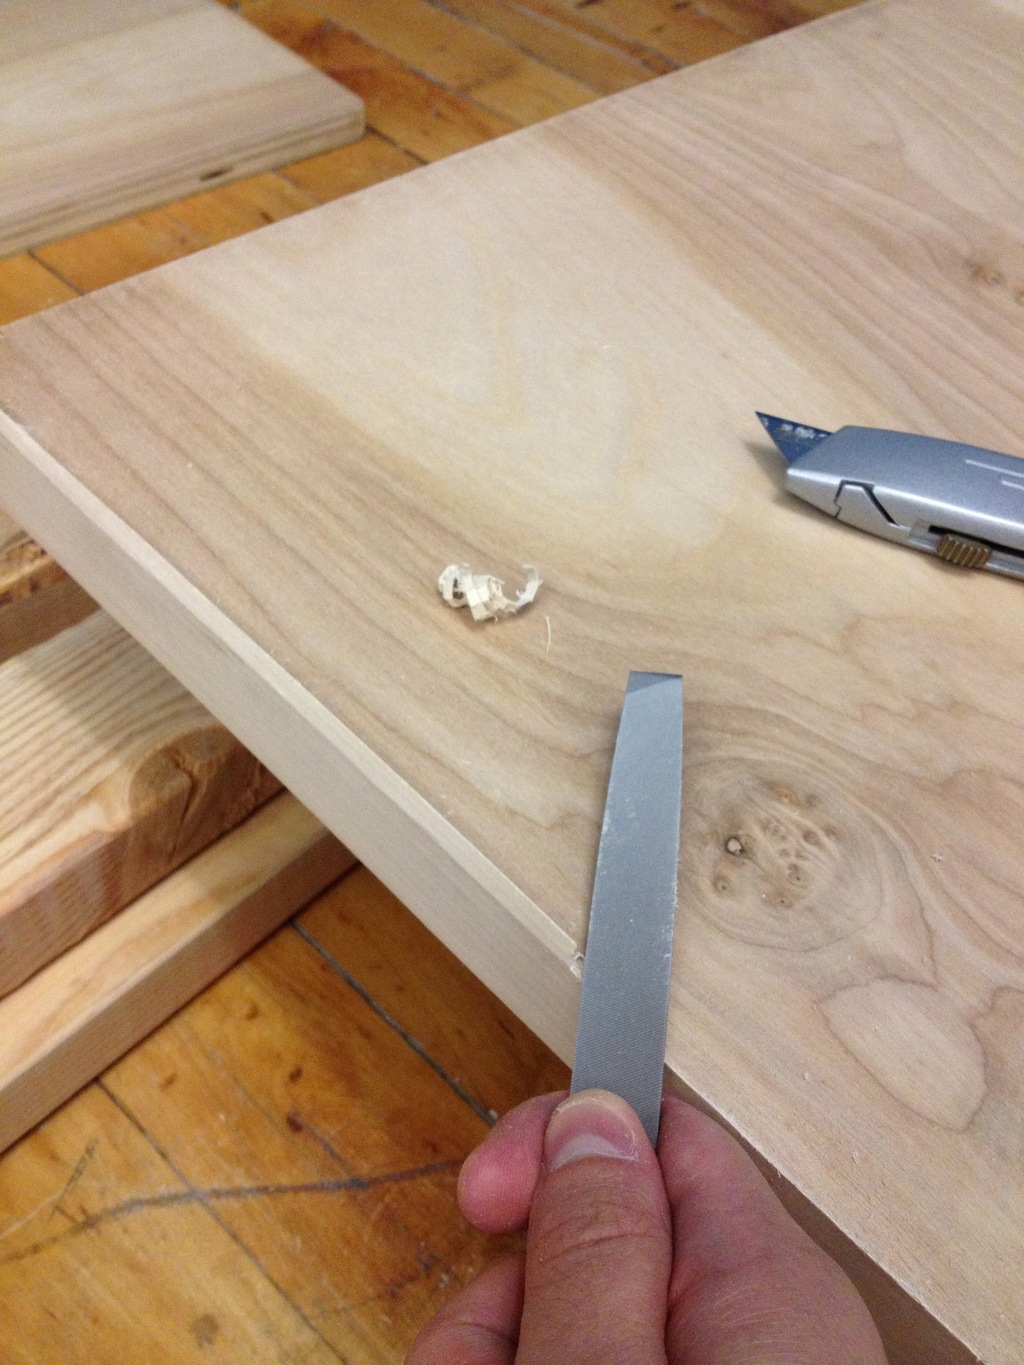
Additionally, if you use a plywood surface, I would recommend attaching veneer edge-banding to cover the rough sides. You can buy pre-glued banding that can be applied with a simple iron — you’ll need enough to cover the circumference of the desk, and I’d suggest a width at least 1/2″ greater than that of your plywood.
Hardware
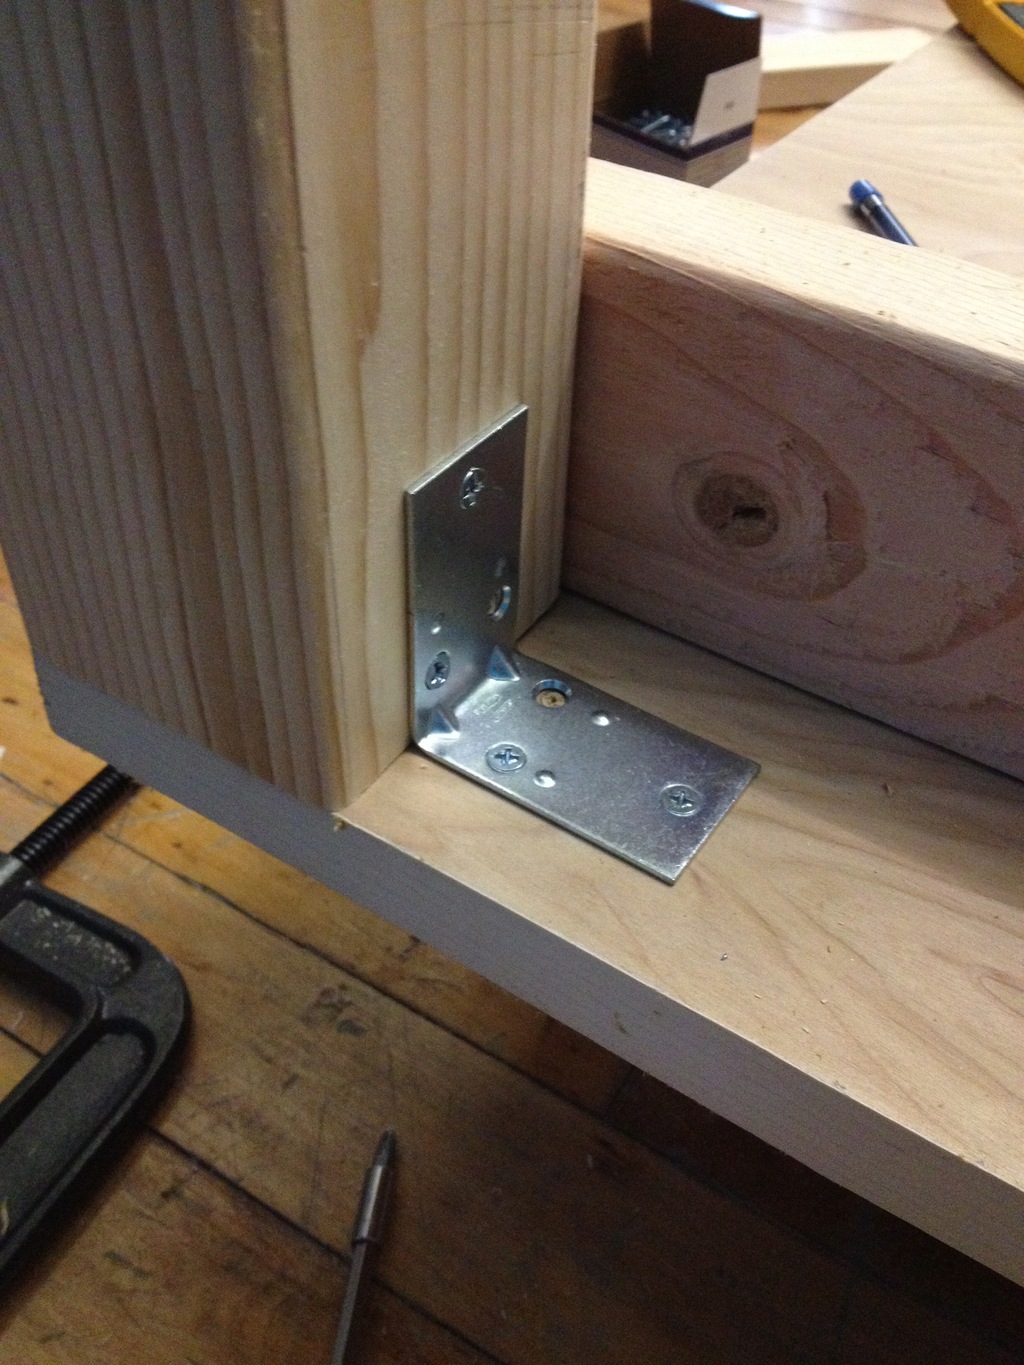
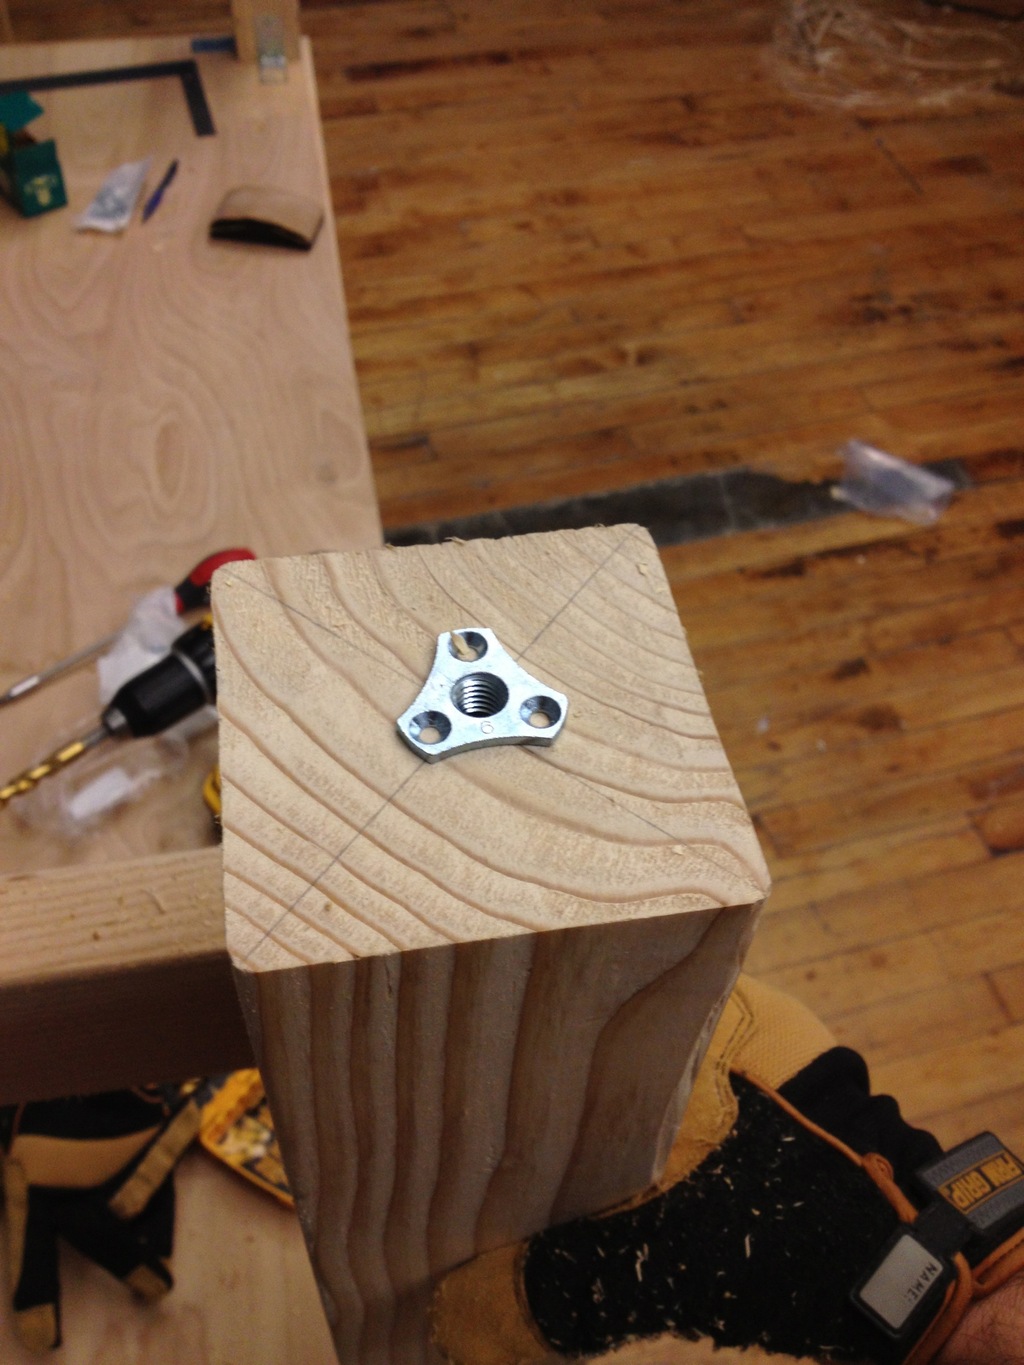
I purchased all my hardware from McMaster-Carr — it’s like a Lego store for grown-ups. The support structure of the bench is screwed directly together, and attached to the bench surface via L brackets. I also drilled out holes in the legs of the bench so that I’d be able to install leveling mounts (feet).
The full parts list follows, with links to McMaster-Carr. The part counts are for a single 6′ x 3′ work bench.
Bench Hardware:
- Brackets to attach legs to top:2-1/2″ Length Of Sides, 1-1/2″ Width L Bracket – 4 total
- Phillips Wood Screw, No 8 Size, 1-3/4″ Length – 1 box
- Phillips Wood Screw, No 8 Size, 5/8″ Length- 1 box
- Phillips Wood Screw, No 8 Size, 2-1/2″ Length – 1 box
It should be pretty obvious which screws go where based on their length.
Leveling mount hardware:
- Leveling mounts: 3/8″ #16 x 4″ thread length with 2-3/8″ Base Diameter – 4 total
- Threaded inserts: Surface-Mount Insert for Wood 3/8″ – 16 Internal Thread- 4 total
- Wood Screws: #6 5/8″ length wood screws- 1 box
Tools
- Power Drill & Bits. You’ll need drill bits for all the listed thread sizes, as well a 1″ bit to drill out channels for the leveling mounts. I highly recommend investing in a quick-change bit, as you’ll be switching back and forth quite a bit. I have a cordless Dewalt that worked out great.
- Countersink bits. Used to allow the head of the countersunk screws to sit flush with the wood surface.
- Clothes iron. Used to apply the veneer edge-banding. Any clothes iron will do, but you probably won’t want to use it on your clothes afterwards. I bought a $15 iron off of Amazon.
- Single-cut, mill bastard file. Used to trim the veneer edge-banding.


A software… cooperative?
We often receive inquiries about how Plausible Labs works, what we do here, and what our goals were in deciding to form as a cooperative.
Since people are interested in how we’re organized and what it’s like to work here, and our bylaws can be a bit overwhelming to read, I decided to put together a brief FAQ on what our cooperative is, how it’s run, and what our goals are as a company.
How are employees compensated?
Our goal is for salaries to be competitive and market rate. End of year profits are split between the cooperative and it’s members — last year we invested 25% of year-end profits back in the company, and distributed 75% to members. Profit sharing is entirely independent of rank or seniority at the company.
How is the cooperative different from traditional company?
Our main goal in forming the cooperative was to find a way to align employee’s own interests more closely with the corporation’s interests. In terms of legal structure, we’re very similar to a standard corporation — the main differences we’ve adopted to meet this goal are in terms of governance and shareholders.
In a standard stock corporation, the CEO is beholden to the board of directors, and the board is ultimately beholden to the shareholders. The same applies to our co-operative; we have both a yearly-elected board and a CEO, as well as shareholders. However, unlike most stock corporations, only members (employees) of the co-operative may be shareholders, and they may only hold one share.
The board is free to make day-to-day business decisions — while the position of CEO is required by California’s corporate law, the CEO can not act independently of the board. Likewise, there are certain decisions — such as modifying the bylaws — that require a full vote of all shareholders.
Since the board is beholden to the shareholders, and the shareholders may only be employees of the organization, it creates a unique alignment of the corporate, shareholder, and employee interests. Profit sharing is one facet of this — in deciding how to invest the corporation’s resources and time, the board and shareholders must also take into account the employee’s personal interests and the resulting affect on their end-of-year dividends.
What’s the work/life balance like?
It really depends on the state of the company and the member’s own short-term goals, but generally speaking, we stick to a 40 hour work week. Sometimes the opportunity demands more — back in March, we all agreed to fly out to NYC and spent two weeks of 12 hour days working on the Comics iPad application.
What kind of work do you do?
We’re currently focused on contracting work for iPhone and Android, and we’re especially interested in work related to publishing, media, and local/community involvement. We also release a number of our libraries and tools as open source.
While we’re very interested in middleware, tools, and other product development, it requires funding. Our corporate structure requires us to be self-funded; we’ve engaged in contracting to build up our reserve of capital and bring on additional coworkers.
As we’ve grown, we’ve been able to better establish ourselves in the contracting market, charge reasonable rates for our services, and take on larger projects. It’s our goal to leverage this position to hire additional engineers and dedicate part of our contracting profits to product development, allowing us to eventually move the company to being more (but not entirely) product-focused.
How do you become a member/employee? Do you have to buy your share?
After an initial six month candidacy period, our bylaws require that — subject to a consensus vote — we either offer an employee full membership, or extend the candidacy period. If the candidate declines or we do not wish to offer full membership at that time, than the cooperative must either terminate the candidate’s employment or extend the candidacy period.
Each full member must be a share-holder in the cooperative corporation — a capital contribution (currently $1k) purchases the member’s share in the corporation. When a member leaves the cooperative, the coop will automatically redeem this amount in exchange for debt:
Article IX (F): When a member’s membership in the corporation is terminated for any reason, the amount in her or his Member Account (including the original capital contribution) will automatically be redeemed in exchange for debt. The corporation shall repay the debt within five years of the membership termination, with interest accruing at the discount rate — as set by the Federal Reserve Bank of San Francisco — plus two percent (2%), on the amount outstanding at the end of each fiscal year.
No capital contribution is required until a candidate’s application for full membership is offered and accepted, which will not occur until after a six month candidacy period. This is intended to provide the co-op members suitable time to evaluate whether they wish to extend an offer of full membership, and the candidate time to evaluate whether they wish to invest in their share of the co-operative. Like any investment in a corporation, the capital contribution provides a cooperative with additional working capital — however, in the case of Plausible Labs, the current contribution amount of $1,000 is not sufficiently large as to provide a significant percentage of our available capital, but it does help offset a small percentage of the hiring costs.
Some cooperatives — such as Arizmendi Bakery — tend to rely much more heavily on member contributions for working capital, and as such may have higher contribution requirements.
More Questions?
Have a question that isn’t covered here? Feel free to email us!
The Plausible Blog
Latest news and musings from the co-op.
Follow us: @plausiblelabs
Recent Articles
- PLCrashReporter Stewardship Moving to Microsoft September 12, 2019
- A New Home for VoodooPad December 14, 2017
- PLRelational: Query Optimization and Execution October 3, 2017
- Let's Build with PLRelational, Part 2 September 28, 2017
- Let's Build with PLRelational, Part 1 September 18, 2017